Archive for the ‘montessori’ Category
Homeschool Planner + Link Up for Fun in the Summer Sun
Posted in charlotte mason, education, homeschooling, montessori, summer, unschooling, waldorf on August 8, 2011| 2 Comments »
Q is for Quilting – ABCs of Homeschooling
Posted in ABCs of Homeschooling, art, education, geography, history, homeschooling, math, memories, montessori, quilt making, read, reading, sewing, textile art, unschooling, vacation, waldorf on August 1, 2011| 7 Comments »
On 5 Kids and a Dog, there’s a series called the ABCs of Homeschooling. This week’s letter is “Q.”
For over four years, Sophia and Olivia have been learning how to quilt. They started hand-sewing a bit before machine-sewing to get comfortable with a thread, needle, and fabric.
One of the first projects that the girls did was a simple patchwork quilt. They picked fabric from what I had on hand (a lesson in itself of resourcefulness and making do).
For some of their first sewing projects, they traced squares onto the back/wrong side of the fabric and then cut them out. They moved onto measuring and marking lines on the fabric. Sophia now can use a rotary cutter to cut fabric.
One of Olivia’s favorite quilts that she made was one using fabric she found at a quilting store in Pella, Iowa. The girls, my parents, and I traveled to Pella in the spring to see the tulips. There was a wonderful quilting store right off the main square.
Olivia liked a printed fabric with dogs on it. From that pattern, she picked several other fabrics to coordinate with it. She cut, arranged, and sewed all the pieces together to create her quilt.
Olivia entered her quilt in the county fair in the youth open class division. She was competing with children up to the age of 16 years old in her category.
She won first prize… a blue ribbon (there are only 6 ribbons – 1st through 6th place – awarded in a category). Needless to say, she was thrilled!
For 2010, at 7 years old, she wanted to challenge herself to do something different. She looked with me at pictures of quilts on Flickr and saw one that she liked. It was a circular quilt made from a variety of fabrics.
The quilt she saw was done in rainbow colors with a white center. Olivia wanted to do hers in all blue fabrics with a white center. Since there was no pattern, we had to create a pattern for the blue pieces and center white piece.
Olivia chose a variety of textures also for the blue pieces which posed a bit of a challenge since each had a different “pull” to it. She had to try sewing different types of fabric together which was a good skill to learn.
Another skill she learned was doing free-style quilting. On the white fabric, she moved her presser foot around in a random pattern to secure the top, batting, and backing together.
Sophia started making quilts in 2006 (when she was 5 years old) and did a simple doll-size patchwork quilt from a kit she received for Christmas. The nice thing about the kit was that the squares were already cut for her. She simply had to sew them together and then create the quilt.
Once she learned how to do that she wanted to create another quilt using fabric that she picked out from what I had on hand. She used the same method as I used with Olivia (tracing of the shape on the fabric and then cutting it out).
By 2008, she was enjoying quilting so her grandma gave her a quilting kit in her favorite color: pink. The kit came with the fabric and pattern, but Sophia had to cut each piece for the quilt.
The fabric was a variety of textures – cotton, satin, and minky. It was delightful to feel (from a sensory perspective). In terms of sewing…a bit more challenging, especially for a beginner quilter.
She patiently worked on the quilt and was so pleased with how it turned out. She used the quilt and enjoyed how it felt with the different textures.
By the following year, Sophia set a goal of making a quilt for her bed. She wanted a quilt in colors that she liked. We checked out some books from the library and she found a pattern that she liked. After a visit to the fabric store, she was ready to start making her quilt.
She was happy with how her quilt turned out; and has used it on her bed since she made it.
She entered the quilt in county fair and received a red ribbon on it (second place). At 8 years old, she was in the category with children up to 16 years old.
When Sophia was 9 years old, she tried a different form of quilting. Her grandma gave her a pre-printed image on fabric. Sophia quilted around different parts of it to give it texture and definition. She added sequins and beads to embellish it, and then finished off the quilt.
She entered it into the county fair for one of her 4-H needlework projects. In 4-H, the children talk with a judge who asks them questions about their project and determines how much they understand about their project area. Sophia received a blue ribbon for her project which made her happy.
During the 2010-2011 homeschool year, Sophia took a sewing class at the homeschool co-op. One of the projects she worked on was learning quilting patterns. During the spring, she learned six new patterns. She chose to sew the squares together to make a little lap or doll quilt.
Quilting has been an important part of homeschooling for the girls. In addition to art/creative expression, quilting helps with math and reading. I’ve also integrated geography and history when doing some of the quilts.
With a back-to-homeschool trip to New England in September to celebrate the start of a multi-year/multi-disciplinary geography study, the girls are excited to visit a quilt shop in New Hampshire that has over 5,000 bolts of fabric.
They each want to pick some fabric so they can make a quilt when they return home. Having a tangible reminder of this special time together is something that I hope they look back on with good memories in years to come.
P is for Painting – ABCs of Homeschooling
Posted in 4-H, ABCs of Homeschooling, art, art education, education, homeschooling, montessori, painting, unschooling, waldorf on July 25, 2011| 4 Comments »
On 5 Kids and a Dog, there’s a series called the ABCs of Homeschooling. This week’s letter is “P.”
One of the activities that the girls enjoy doing is painting. When they were younger, they did quite a bit of wet-on-wet watercolor painting.
I would soak the watercolor paper in water for a bit, lightly dry it off, and then she would paint using all-natural paints. The paints were made from plants and were from Germany. They were nice quality paints which resulted in some pretty colors.
Initially, I had the girls start with painting only one color. Then they learned to combine a couple of colors.
They also have enjoyed painting clothes and accessories. When they were younger, the painting was more abstract; and as they grew older the did more representational/realistic painting.
One Christmas, the girls received paint kits. They traced the first letter of their first name onto a canvas and then added different shapes and swirls around the letter. Using a variety of acrylic paint, they created their own unique images.
Another activity the girls enjoyed was tracing their hands onto canvas, coloring the hand with oil pastels, and then painting with watercolors around the outside of the handprint.
They also have enjoyed painting without a paintbrush. They’ve used fingers, hands, pine needles, marbles, and vegetables.
Doing vegetable and fruit printing was a fun process. Using peppers, apples, celery, and other fruits and vegetables yielded some interesting and pretty prints.
Using hands and getting messy are the fun parts of painting for the girls.
In addition to creating their own images and work, they also enjoy using painting kits. Early on, they did some simple watercolor painting with pre-printed images.
When they were 7 and 9 years old, they each did a paint-by-numbers kit. These are not the kits that I grew up with which were substantially easier.
These kits had very tiny spaces, lots of blending of paints, and required much patience and time. The end-product is one that both the girls were so proud of and framed.
They each entered their paint-by-numbers paintings in the county fair and/or 4-H; and both did very well. Entering the paintings for 4-H (in Cloverbuds and Crafts) was a great way for the girls to share their experience about painting and what they liked/found challenging about the process.
Summer Cattail Observations – Outdoor Hour Challenge Summer Series #7
Posted in birds, charlotte mason, education, Handbook of Nature Study, learning, montessori, nature, science, unschooling, waldorf, wildlife on July 24, 2011| 1 Comment »
In the spring, we did a nature study about cattails. It was the first of four studies that we will be doing over a course of the year. This idea came from the Handbook of Nature Study website, and is the
Outdoor Hour Challenge Summer #7 – Summer Cattail Observations.
.
Throughout this post, three different typefaces are used:
– Bold – are words from the Handbook of Nature Study website.
– Italics – are words from the book titled Handbook of Nature Study by Anna Botsford Comstock.
– Regular – are my own words.
Inside Preparation Work:
Read pages 500-502 in the Handbook of Nature Study if you have not done so before (starting on page 551 if you have the free download version) . It might also be beneficial to read it again this season and highlight the parts that contain information about the leaves of the cattail plant.
The following parts of the book were shared with Sophia and Olivia:
In June and early July…it will be seen to have the upper half of the cat’s tail much narrower and different than the lower half – as if it were covered with a quite different fur.
It seems to be clothed with a fine drooping fringe of olive yellow.
The fringe is a mass of crowded anthers, two or three of them being attached to the same stalk by a short filament.
These anthers are packed full of pollen.
All the leaves have the same general shape, but vary in length.
Each leaf consists of two parts: the free portion, which is long and narrow and flat towards its tapering tip but is bent into a trough as it nears the plant; and the lower portion, which clasps the plant entirely or partially, depending upon whether it is an outer or inner leaf.
The texture of the leaf is soft and smooth.
The cattail is adopted for living in swamps where the soil is wet but not under water all the time.
The cattail roots are fine and fibrous.
Outdoor Hour Time:
Enjoy your outdoor time this week at your cattail spot. If you have been participating in the year-long cattail study since last autumn, you will know just where to look for cattails. Use the suggestions from the Handbook of Nature Study to talk a little about the habitat where your cattails are growing.
Is your cattail still growing in water or has it dried up?
The cattails are both growing in and out of the pond.
What does the “cattail” parts of the plant look like now?
Sophia said that the cattail part is, “Brown, fluffy, and tough.”
“There’s some kind of stem at the top,” Olivia said.
I asked the girls to remove one of the cattails so that they could observe it closer inside. Olivia tried to snap off the cattail, but the stem was very tough to remove. Sophia tried, struggled a bit, and finally was able to break it off.
What color and shape are the leaves?
Olivia said, “Long and green.” Sophia said, “Long, pointy at the end, silky, smooth, and green.”
Do you see the cattails seeds or balloons?
The balloons are the parts that we see now. (We had to look up what a cattail balloon is on the internet and found that it is the term for the long, oval brown part of the cattail.)
Can you pull some of the fuzz from the cattail and observe it more closely?
We took one cattail as well as a small section that was on another stalk. We brought these two items inside to look at them closer with a magnifying glass. Some of the plant is included in the nature journal page.
How do you think the seeds spread, by wind or water?
The girls both thought they would be spread by the wind.
However, as we discussed it more, we thought the seeds could be spread by both wind and water – the wind could carry the seeds to different nearby areas of the pond and pasture; and the water could carry the seeds (once they landed on the water) to different parts of the pond itself.
How crowded are the cattails growing together?
Some of the cattails grow close together in the pond while other cattails are growing by themselves in different parts of the pond. and pasture.
Train Your Senses
Sight: Observe the cattail’s habitat. Look for birds, insects, and animals living or resting in or on the cattails. Look for nests. See if you can find the cattail flowers.
The girls saw red-winged blackbirds, two unidentified birds, many dragonflies, and mosquitos. The dragonflies were twelve-spotted skimmers. We were seeing the brown and white winged ones – the males. We didn’t see any females.
Smell: Sit or squat near your cattails and close your eyes. Breathe deeply and see if you smell anything.
We didn’t sit near the cattails because most of them were near or in the pond. There seemed to be a lot of mosquitos and other insects near the edge of the pond.
Olivia was having a particularly difficult time with all the bugs, so I opted to move on to walking in the wooded area of the pasture and see if we could spot anything else of interest.
Touch: Feel the leaves, edges, and spikes of the cattails.
Both of the girls felt the leaves and thought they were soft and silky. Despite the softness, they are quite tough and provide a bit of challenge when trying to break a small section off.
Hearing: Take a minute to listen as you stand or sit near your cattails. Can you hear any birds or insects? Water running?
The red-winged blackbirds were the predominant sound…that and the buzzing of mosquitos. The water is in a pond, so there isn’t much movement on a relatively calm day.
Follow-Up Activity:
Make sure to allow some time after your outdoor hour to discuss any subjects that your child finds interesting. Encourage the completion of a nature journal entry recording your observation of your cattails. You may wish to pull out your other cattail entries and compare the year-long changes in your cattails.
Once we were inside, we spent time touching and looking at the cattail balloon and leaves. From a sensory aspect, the cattail has such a diversity of textures which makes it an interesting plant to explore.
O is for Orchestra – ABCs of Homeschooling
Posted in ABCs of Homeschooling, art, art education, homeschooling, montessori, music, unschooling, waldorf on July 18, 2011| 2 Comments »
On 5 Kids and a Dog, there’s a series called the ABCs of Homeschooling. This week’s letter is “O.”
One of the elements of homeschooling for our family is music. Starting at the end of fourth grade, both Sophia and Olivia were/will be given an opportunity to choose an orchestral or band instrument to learn in addition to piano.
They both have a strong interest in orchestral music, so it looks like that is what area they’ll choose. Having an interest in the orchestra most likely stems from attending student performances at the Minnesota Orchestra.
at the Minnesota Orchestra. In the background,
the orchestra is warming up.
Not only can Olivia see the stage, but the girls become even more engaged in the performance since they can see some of the musicians’ faces and expressions, and how they place the instruments.
The girls are 8 and 6 years old in this picture.
playing together.
N is for Nature – ABCs of Homeschooling
Posted in art, birds, butterflies, caterpillar, education, Handbook of Nature Study, learning, memories, montessori, nature, nature walk, unschooling, vacation, waldorf, wildlife on July 12, 2011| 4 Comments »
On 5 Kids and a Dog, there’s a series called the ABCs of Homeschooling. This week’s letter is “N.”
Nature is a major focus of homeschooling. Living on almost ten acres of land, nature surrounds us each day.
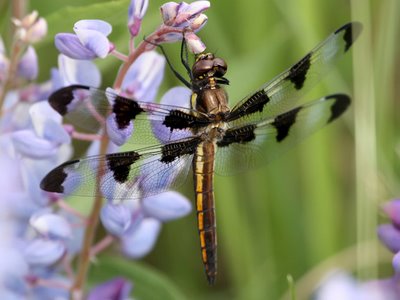
One of the girls’ favorite activities during the summer is raising butterflies. In 2008, there were an abundance of monarch caterpillars. Seeing the life cycle – from caterpillar to butterfly was fascinating for the girls.
Perhaps the most memorable release was when a monarch butterfly was brought outside and didn’t want to leave the girls. It stayed on their fingers, flew to a nearby milkweed plant, flew back in front of them, and then…eventually…flew off.
Both Sophia and Olivia enjoying feeding the birds and squirrels. One of the first activities I had both of the girls do for homeschooling involved watching the birds that visited the feeders. Each time a bird would visit, the girls would add a check mark next to the type of bird.
After a certain period of time (10-15 minutes…30 minutes if they were interested and lots of birds were visiting the feeder), they would create a chart to show which type of bird came to the feeder the most.
One of the nice things about living in the country in a home that was built in 1890 is that the surrounding land has some very old trees which are great for climbing. The girls started out climbing the apple trees in the backyard, and have moved onto some of the larger pine trees in the front yard now.
During the past year, we have begun taking time for weekly nature study using the book Handbook for Nature Study by Anna Botsford Comstock.
Taking the time to learn more about the wildlife, trees, and seasons has been such a highlight of the past year. It has given us a new appreciation for the land here as well as the wildlife that visits and lives on our farm.
Since the girls were young, gardening has always been a part of their life. They have learned to raise vegetables, pumpkins, fruit, and flowers. Both have been able to plant seeds; transplant trees; and harvest and preserve what they’ve grown.
We enjoy going on walks with the dogs and horses. Living in the country, there’s always something interesting to see in the fields, in the sky, along the road, or in the ditches.
One of my favorite pictures is of Sophia on the far nature trail spreading milkweed. She had lots of milkweed pods in her pocket and she would open them and let the wind carry the seeds to new locations.
She hoped that by doing this, there would be more milkweed available for the monarchs the following year…and in years to come.
Even though there are plenty of opportunities to explore nature right at our home, in the pastures, and on the nature trail, we enjoy exploring other areas as well. One of our favorite places to visit is William O’Brien State Park.
We also have enjoyed walking on some of the trails at the Minnesota Valley National Wildlife Refuge. This is a bit of a drive, but the trails are easy to walk and provide a different view of what we normally see at home.
We enjoy picnics outside (especially when there are no bugs – which is spring and fall in Minnesota). There are lots of places to have picnics, but parks that have a lake or river by them are ones that are especially nice.
Sometimes we visit places after we read about book. If a topic in a book interests the girls or if seeing an example of what was mentioned in the book would be of benefit, I try to find a place to go that would extend their learning.
For example, a few years ago, we visited Interstate State Park as part of a unit study we did on the ice age (after reading one of the Magic Treehouse books about the ice age).
Since the girls learn best by seeing and touching, I took them to this park to see first-hand what gorges are and the impact the ice age had on the area where we live.
This park has some fascinating and beautiful rock formations, glacial potholes, and gorges. The St. Croix River runs between the Minnesota and Wisconsin sides of the park.
When we travel, we always make sure that nature is part of our trip. One of our favorite places to visit is Grand Marais (Minnesota). The girls enjoy being able to be in Lake Superior (although the water is very cold) and play on the shoreline.
One of their most memorable moments on a trip to Grand Marais that we took in September 2010 was being able to feed a chipmunk. We traveled up the Gunflint Trail and stopped along the way.
At the stop, there was a very friendly chipmunk who the girls fed Pik-Nik sticks (fried potato sticks). The chipmunk came up so close to them. They still – almost a year late – recall that moment as if it happened yesterday.
L is for Literature – ABCs of Homeschooling
Posted in ABCs of Homeschooling, Alzheimer's Disease, books, history, homeschooling, memories, montessori, read, reading, unschooling, vacation, waldorf on June 28, 2011| 3 Comments »
On 5 Kids and a Dog, there’s a series called the ABCs of Homeschooling. This week’s letter is “L.”
Literature is written or spoken material that is the work of the creative imagination, including works of poetry, drama, fiction, and nonfiction. Through the current curriculum I’m using with the girls (Sonlight), we’ve been introduced to wonderful literary works in each of the genres mentioned.
In addition to using the books that are part of the Sonlight curriculum, I’m also using several lists of books to introduce the girls to a wide variety of literature (e.g., Newbery Medal, Caldecott Medal).
The Association for Library Service to Children has a website that has information about different awards that are given each year to children’s books that are of high quality. Each award has a different focus. The ones that we’re focusing on include:
– (John) Newbery Medal – honors the author of the most distinguished contribution to American literature for children.
– (Randolph) Caldecott Medal – honors the artist of the most distinguished American picture book for children.
– (Theodor Seuss) Geisel Medal – honors the author(s) and illustrator(s) of the most distinguished contribution to the body of American children’s literature known as beginning reader books published in the United States during the preceding year.
– (Laura Ingalls) Wilder Award – honors an author or illustrator whose books, published in the United States, have made, over a period of years, a substantial and lasting contribution to literature for children.
Reading is such an integral part of homeschooling for us. Since the girls were young, I have read to them daily. Once Sophia began reading on her own, she spent more time being able to read independently which expanded the number of books she listened to/read each day. The girls both listen to books on CD as well.
In addition to reading inside, the girls enjoy reading outside – on blankets on the ground with the clouds and trees as the backdrop…or in one of the climbing trees in the backyard.
Literature has introduced the girls to historical facts, given them insight into different cultures; and provides the inspiration to learn more about different times and traditions other than their own.
Some of our favorite homeschool memories center around literature-based unit studies. The first series we did was the American Girl one that focuses on ten year old girls from a variety of ethnicities and time periods in the United States.
We started with the Kaya series which was set in the 1700s with the Nez Perce and finished with the Julie series that was set in the 1970s and had a Chinese-American sub-theme (this was nice for the girls who are both Chinese-American).
The girls and I did crafts, cooked/baked food that tied into each series, and took field trips to places to bring alive what they were reading in the American Girl Series.
The other series that we enjoyed was written by Laura Ingalls Wilder. Starting with Little House in the Big Woods and ending nine books later with The First Four Years, we not only read the books but did hands-on activities and took a trip to Pepin, Wisconsin (where Laura spent the early part of her childhood).
We visited Pepin once when we started the series and were reading Little House in the Big Woods to see where Laura’s childhood home was located, saw the cemetary where some of the people mentioned in her book were buried, and visited a museum focused on the Ingalls family/Laura Ingalls Wilder.
In 2010, we went back to Pepin with the girls’ grandparents; and stopped at the lake and went through town.
Children’s literature also has opened up the girls’ imagination and fostered an enthusiam for learning about things that they normally wouldn’t have thought or known. For example, I read to the girls a long time ago a book called Mailing May in which five-year-old Charlotte May Pierstorff begs to visit her grandmother, but her parents cannot afford to send her.
In Idaho in 1914, the train is the only way to make the 75-mile trip over the mountains. The Pierstorffs come up with an unusual solution – mailing May. Sending her as a package is a third of the cost, and since her mother’s cousin Leonard handles the railroad mail car, she does not have to travel alone.
So, we were on a trip up north a few years ago, and visited a train museum. There happened to be an old, restored mail car at the Duluth train museum. This brought to life this book which the girls clearly remembered and made the connection to; making the visit such a fun experience for the girls.
Another way that literature has been a part of homeschooling is by sharing the gift of reading and quality books with others. We have donated many books to the local second-hand shop. All the proceeds from the sale of the books help fund programs that serve those in need in the community.
The girls also donated some books to Books For Africa through the 52 Weeks of Giving program that we’re doing this year.
And, perhaps, most meaningful (on a personal level) is seeing the gift of reading and literature shared between generations. One of my father’s favorite books that his mother read to him when he was a boy was The Story of Ferdinand.
The story, written in 1936, is about a bull who would rather smell flowers than fight in bullfights. He sits in the middle of the bull ring failing to take heed of any of the provocations of the matador and others to fight.
How to Stay Cool in the Summer Heat – Link-up Party!
Posted in animals, birds, food, gardening, homeschooling, learning, montessori, nature, recipe, summer, unschooling, waldorf, wildlife on June 27, 2011| 4 Comments »
Each Monday until September 7th
Mama to 4 Blessings along with Harvest Moon By Hand,
Adventures of Mommydom, Sweet Diva, and Sweet Phenomena
will be hosting Fun in the Summer Fun link up events.
Here’s the line up:
Then we finished the day by heading back inside to the conservatory and the summer flower display. It was a spectacular ending to a wonderful day!
Below is a recipe that I made this week that we all enjoyed (except Olivia who doesn’t like spicy food). It is from Ross Turnbull, Executive Chef at the Princeville Resort (on the island of Kauai in Hawaii). It isn’t a salad, but it reminded me of a place that gets hot (Hawaii) and the lighter, “cooler” fare they serve during the hot months.
Ingredients
2 Cups diced fresh Maui gold pineapple
1/2 Cup fine diced red bell pepper
1/2 Cup fine diced red onion
1/2 Cup fine sliced scallions
Pinch fine chopped habanero pepper
2 Tbsp fresh chopped cilantro
2 Tbsp fresh lime juice
1 Tsp extra virgin olive oil
1/2 Tsp fresh chopped mint leaves
Hawaiian sea salt and black pepper to taste
Directions
Combine all ingredients in a plastic bowl and allow to marinate one hour before serving.
Out of the beverages, the favorite one was rhubarb strawberry slush that used rhubarb from the garden and strawberries that we picked at a local berry patch.
Below is a picture and recipe for the Rhubarb Strawberry Slush that we enjoyed. What I like about this is that the frozen rhubarb-strawberry juice can be frozen and used anytime throughout the summer – particularly the very hot days when a refreshing beverage would be needed.
Rhubarb Strawberry Slush
Ingredients
8 cups diced fresh or frozen rhubarb
1 package (16 ounces) frozen unsweetened strawberries
3 cups sugar
8 cups water
1 package (3 ounces) strawberry gelatin
1/2 cup lemon juice
11 cups ginger ale, chilled
Rhubarb curls, optional
Directions
In a Dutch oven, bring the rhubarb, strawberries, sugar,and water to a boil. Reduce heat; simmer, uncovered, for 5-8 minutes or until rhubarb is tender. Press through a sieve; discard pulp. Stir in gelatin and lemon juice until dissolved. Transfer to a freezer container and freeze, stirring occasionally, until firm. May be frozen for up to 3 months.
Note: I froze the liquid in a 9″x13″ pan. After it froze, I took it out of the freezer and let it thaw a bit. Then, I cut it into 24 pieces. Next, I placed the pieces onto a cookie sheet and re-freeze. At this point, they were placed into plastic bags and kept in the freezer to use for individual servings.
To use frozen rhubarb mixture: In a punch bowl or several pitchers, combine equal amounts of rhubarb mixture and ginger ale. Or for one serving, combine 1/2 cup rhubarb mixture and 1/2 cup ginger ale in a glass. Garnish with rhubarb curls if desired. Serve immediately. Yield: 22 servings (1 cup each).
Note: If using frozen rhubarb, measure rhubarb while still frozen, then thaw completely. Drain in a colander, but do not press liquid out.
Set up a birdbath
Birds enjoy taking a quick dip on a warm day just as children do. Either use a birdbath that’s available at a local store or make your own by inverting a garbage can lid in a base of flat stones or bricks. Fill it with some water and a few small rocks (for a landing place).
The birdbath is near the hummingbird feeder and birdhouse that the wrens are using, so we can watch and hear the birds. The baby wrens were born within the past couple of weeks, and both wren parents are flying back and forth non-stop to find tiny insects and worms to feed the babies.
Now it’s your turn! What are some ways that your family stays cool during the summer?
K is for Kitchen – ABCs of Homeschooling
Posted in ABCs of Homeschooling, birds, cheesemaking, community service, donate, donation, food, geography, holiday, homeschooling, math, memories, montessori, nature, science, unschooling, volunteer, waldorf on June 21, 2011| 7 Comments »
On 5 Kids and a Dog, there’s a series called the ABCs of Homeschooling. This week’s letter is “K.”
During the past few years, I created an ABC Journey Around the World in which the girls learned about a different country in alphabetical order (e.g., Australia, Brazil, China, Denmark, Egypt, France, and so forth until ending with Yemen and Zambia).
One of their favorite parts of learning about other countries was seeing what people would eat in different parts of the world. I found recipes on the internet as well as through recipe books from the library. We tried anywhere from one to six recipes per country (some were easier to find recipes for than others).
The kitchen is more than a place to cook and bake food. With homeschooling, the kitchen also becomes an area to do science experiments and hands-on activities.
One of the science lessons that the girls did focused on marine life and pelicans. Apparently a pelican can hold 13 1/2 quarts of water in its pouch. The water drains out, leaving only the fish which the pelican then can swallow and eat.
In the photograph above, there are 2 marshmallows in the sink representing fish. Sophia’s job is to catch the marshmallows. It’s harder than it looks.
The girls learn best when they can make a hands-on, tangible connection with the subject about which they are learning. This is so important when the concept might be more difficult for them (e.g., electricity) or would benefit from a visual example (e.g., lung capacity).
Sometimes when we’re cooking, the girls learn new words or make a connection between what they’re cooking with something else they’ve heard or learned. For example, when we were making cheese, the curds separated from the whey. They immediately made the connection with the nursery rhyme they had heard many times:
(The curds are the white part; the whey is the liquid.)
For one nature study, we focused on learning about dandelions. In addition to the science part of the study, we added a culinary component where we made dandelion cookies, dandelion vinegar, and dandelion oil/salve.
The kitchen also is a place where the girls create things for the holidays and different seasons.
An important part of our time in the kitchen is when we make food to help others. We have made many meals and desserts for people experiencing medical/health challenges; and have chosen to donate some of our food to those in need.
We also make food for animals – treats for the dogs, cats, and horses; and for wildlife. Making food for the hummingbirds to drink during the summer and suet for the birds during the winter are regular activities.
Seeing how excited the animals are to get a treat…and to see the variety of birds that now visit the feeders is a lot of fun. Being able to observe animals up close (especially birds) is such a highlight of homeschooling.
So many subjects are covered in the kitchen beyond home economics – reading, math, science, community service, and geography. The kitchen truly is one of the centers of learning for homeschooling…and one of our favorite places to learn!
Exploring Yemen and Zambia Through Food
Posted in food, geography, homeschooling, learning, montessori, recipe, unschooling, waldorf on June 17, 2011| 2 Comments »
For the past few years, Sophia and Olivia have been learning about different countries around the world alphabetically. We started with Australia, Brazil, and China; and now have ended with Yemen and Zambia.
I thought it would be good for them to learn more about the world beyond the United States, so I picked a different country to study for each letter of the alphabet. (Since there is no country that begins we “X,” I picked Mexico for that letter.)
One of the girls’ favorite ways to learn about other countries is through food. I found recipes for each of the countries we studied, we shopped for the ingredients, prepared the food, and then ate what we made.
Sometimes the food was incredibly good, and we all wanted to make the recipe again. Other times…well…let’s just say that those were educational and culinary experiences.
This month we finished this multi-year world geography unit study by focusing on Yemen and Zambia. Each had food that we would definitely make again.
I couldn’t find many recipes for Yemen on the internet. However, I did find one for Yemenite Eggplant Salad.
There is one ingredient in the Eggplant Salad, zhoug, which has many of the same ingredients as salsa (e.g., cilantro, chilies, garlic). Zhoug’s base isn’t tomatoes (like it is with salsa), but one of the main ingredients in Yemenite Eggplant Salad is tomatoes, so it was a less expensive and readily-available substitute.
Although the recipe calls it a salad, it looks more like a dip. So, we placed some of the salad on the wheat crackers instead.
The eggplant salad is very spicy. Sophia and I liked it, but Olivia can’t even handle mild salsa, so this would have been way too spicy for her to enjoy. She did taste a little, though; and then was barely able to utter “HOT!” before following it with quite a bit of water. With one tablespoon of black pepper…it certainly was hot.
Yemenite Eggplant Salad
1 pound eggplant
1 cup chopped tomato
1/2 cup tomato puree, fresh or canned
1 teaspoon minced garlic
1 tablespoon freshly ground black pepper
1/2 teaspoon salt
1 teaspoon zhoug, or the milder condiment, shatta (we used salsa instead)
Preheat the oven to 400 F.
Bake the eggplant until it is very soft, about 35 minutes. Peel and cool. mash the eggplant pulp and mix with the chopped tomato. Add the rest of the ingredients and mix well.
Uchi (Honey) Bars
1/2 cup sugar
3/4 cup Zambia Gold honey
1 cup peanut butter
3-4 cups cornflakes (or your choice of cereal)
1 cup nuts
Melt sugar and honey together on the stove until sugar is completely dissolved. Take off heat and mix peanut butter into the mixture. Gradually add the nuts and cereal, alternating, until all dry ingredients are thoroughly mixed. Spread the mixture into a greased 9 1/2 x 11 inch pan and place in the refrigerator until hard.
Note: Although this recipe came from a Zambian website, I think it was promoting its Zambian Gold honey…so this may not be totally representative of Zambian food.
Sweet Potato Snacks
2 sweet potatoes
1/2 an onion, chopped into small pieces
Wheat flour, just enough to bind the rest of the ingredients together
Chilies (we didn’t use chilies since we wanted Olivia to try it)
Coriander (cilantro) leaves (I used about a handful)
Salt (not much…just to add a bit of flavor)
Peel sweet potatoes and grate or cut into very thin slices (Sophia grated them). Chop coriander leaves, onions and chilies fine. Add salt, coriander leaves, onion, chilies and a little flour to sweet potatoes and mix well. Shape into small round balls and deep-fry in oil. Serve warm.
Note: To make the sweet potato balls healthier, we baked them in a 400 degree oven until they were cooked through and the potato part was soft.
Fried Plantains
Oil
Plantains, one per serving (plantains can be cooked while they are unripened and green)
Salt or African Hot Sauce
Peel and cut plantains, either into thin slices, or slice each plantain in half and cut each half lengthwise.
Heat the oil in a pan or skillet on the stove top. Add plantains (in a single layer) and fry until golden.