Feeds:
Posts
Comments

Archive for the ‘origami’ Category

For those of you who also have been participating in The Summer of Color and/or who are following along each week, thank you for all the positive comments about what I’ve made each week. Thanks to

During the challenge, I’ve enjoyed creating a variety of window stars and quilt squares in each of the featured colors. The encouraging and uplifting comments have been such day-brighteners for me!  Thank you! 

I’ve been enjoying seeing the creativity and beautiful items that the participants create each week. It’s amazing how diverse all the items are even though we are all using the same color. 

For this week, Kristin assigned the color orange. So, I made two orange window stars that have 16 points each.  Each star is made with a special translucent paper that lets the sun’s light shine through and illuminate the pattern.

Orange Sunburst Star with 16 Points
Orange window star to brighten a room.

This past week I had an interesting thing happen: a hummingbird visited one of the window stars I made that had four colors in it: red, orange, yellow, and pink.

It hovered around the window star for quite a while which was such a treat to see!

Autumn Window Star
I’m wondering if the hummingbird will come back
this week and visit the window stars.

I added a couple more orange stars on August 2nd:

I usually don’t make a lot of orange window stars,
but the summer sun seems to make the patterns more defined.

I finished two more quilt squares so there are now 16 squares ready to be made into a quilt. 

Two quilt squares in orange-patterned fabric.

I’m beginning to think about how to put all the squares together into The Summer of Color Quilt. I’m committed to only using what I have on hand, and it looks like white is the color of fabric that I have the most of – so that will (most likely) be the background of the front of the quilt (in between each of the squares).

The back side of the quilt will be the twin sheet that my daughter no longer uses. It’s a very soft cotton with a high thread count.

It has images of lavender pale lavender violets with a plum- and yellow-color center.  There are 1-2 leaves behind each flower.

With purple and green as my favorite colors, this seemed to be the best piece of fabric for the backing.

Read Full Post »

This month the Unique Women in Business team is doing a Blog Hop focused on Summer Fun.  With temperatures in the 90s (some close to 100 degrees) and dew points in the 70s it feels like it’s quite tropical here in Minnesota.

For me, having fun during the summer means having some flexibility to do things I enjoy doing since the homeschooling schedule is a bit more relaxed compared to the September-May time period. 

During June and July, I’ve been able to make new window star patterns. Here’s a design that I created recently:

Window star in summer colors.
Window stars are available in my shop, Harvest Moon by Hand.

The window star that is pictured above reminds me of sunsets and sunrises in colors I typically see in the summer. There have been some spectacular ones that have colored the entire sky in shades of these colors.  I am always in awe of the incredible natural beauty that surrounds me.

*~*~*~*~*~*~*~*~*~*

Today, I was teaching a friend of my daughters how to sew since she wants to learn how to make her own clothes. The first project I had her do was a little bag with an attached tie.

There were no measurements for this pattern – it was simply an idea presented in a book.  So I showed her how to estimate and create the dimensions for each of the pieces.  By the time she was done sewing her first bag, she had learned some fundamental sewing skills…and felt very happy with what she made.

After seeing the bag (and trying out the pattern I’ve wanted to do for some time now), I made a couple of bags after she left and changed the proportions slightly. 

Two bags that I made.
The bags are a great way to use fabric and ribbon scraps. I’ve made re-usable gift bags using only one color of fabric for birthdays and Christmas.
As I made these bags, I thought they would be good to use for the girls in their backpacks or when traveling. By making the bags in a variety of different sizes and patterns, one’s suitcase, purse, or backpack could be much more organized.
*~*~*~*~*~*~*~*~*~*
Last, having fun during the summer means being able to enjoy nature up close. Today I enjoyed watching a bird take a bath in the birdbath in the backyard. For several minutes, it cleaned its feathers…tossing the water in the air and under its wings.
That, in itself, would have made me happy today. But…I woke up this morning and found that two of the butterflies we’ve been raising since they were caterpillars had emerged from their cocoons.
Around 11:25 a.m., the third butterfly was born and we were able to watch its wings unfold, dry, and be strong enough to fly. What an amazing process!
The girls (and Eenie) watching two of the
newly-born butterflies.

After lunch, we released the butterflies in the backyard. The black tiger swallowtails flew off immediately. One flew right to the purple flowers in the butterfly garden in the backyard where it visited lots of flowers while its wings beat quickly.

The butterfly was flapping its top wings so quickly
(thus, the picture is blurry on the top).
It was such a joy to be able to watch them
change from caterpillars to butterflies during July.

Read Full Post »

I can’t believe this is already Week 6 of The Summer of Color challenge. This week’s color is red; and I did a couple of things with this color.

First, I made two red window stars. They are made from translucent paper that lets the light shine through so the pattern of the star is revealed. 

Two red origami window stars.

The 8-pointed star with the sharp points is folded 9 times per point. With eight points, it is folded 72 times before it is glued together.

The other star I made is folded 19 times per point. With 8 points, it is folded 152 times before being glued together.

*~*~*~*~*~*~*~*~*~*~*~*

I also made two quilt squares this week. There are twelve squares now…the quilt is coming along.

Two red quilt squares. Seven different fabrics are used for each square
to represent seven days in the week.

As I mentioned last week, I’m using only fabric that I have on hand for the quilt. I’m not purchasing anything new. It’s definitely one of the most resouceful, “make do” quilts I’ve made. Only four more weeks left – or eight quilt squares – before I’m able to start arranging them and laying out the quilt top. 

*~*~*~*~*~*~*~*~*~*~*~*

Although the red isn’t as vivid on this little bird as it is on adult robins, it fits the challenge of incorporating something winged into your work (in this case, a quick photo).

I was walking to the garden on Friday afternoon, and a ball of feathers moved on the ground.  A baby robin had fallen from its nest.

Baby robin on the ground.

It was quiet for a while, but very curious and eager to be fed.

When I moved the camera a bit closer,
it opened its mouth slowly to be fed.
After a call to the wildlife rehabilitation center, they said that it would be fine to pick up the bird and put it back in the nest if it had not already flown back up to the nest. Birds have a very weak sense of smell, so there’s not a problem with the mother rejecting the baby.
By the time I went back outside, the baby bird had flown back into the nest. I felt so lucky to have been able to see the young bird at this stage of its life. Normally, the robin nests are so high and well-protected that the young ones are not visible until they are fully-grown.

Read Full Post »

I’ve been enjoying the past four weeks of The Summer of Color challenge. Week 5 is no different.  This week’s color is brown, and I made three origami window stars as well as completed two more squares for my Summer of Color quilt.

Window stars that I made with brown translucent paper.
Each of the star points is folded multiple times and glued. Then, the points are attached to one another to reveal the window star’s pattern.
I’ve made this pattern before, but never in brown.
It’s interesting how different color paper
can completely change the look and feel of the window stars.

The sun was particularly bright on Sunday afternoon. With a 68% humidity level and temperature in the upper 80s, it felt quite tropical outside. And, to think, about two months ago there was snow on the ground. With the sun so bright, it almost makes the window star points glow.

This would be a good window star to
put up around autumn or Thanksgiving.
The quilt is coming along. I have ten 12-inch squares done which is good.
Ten quilt squares are done.
My goal is to use only fabric that I have on hand rather than buying new fabric.
For each of the quilt squares, there are seven different fabrics used.
Seven represents the number of days in the week.
I’d like to use the fabric that I’ve had for some time now and put it to good use.
This is not the order the squares will be in for the quilt.
I’m going to have a plain-colored piece of fabric in between each
row and column to break up the squares.
(Yes, that’s a dog nose in the upper right hand corner of the picture.
Montague is resting near the quilt squares.)

Read Full Post »

I’ve been enjoying the past three weeks of The Summer of Color challenge. Week 4 is no different.  This week’s color is yellow, and I made two origami window stars. 

Both of the window stars use some of the folds that I regularly use in the suncatchers I make, but each one is my own design.

The star on the left side is folded 11 times per point. With 8 points, that’s 88 folds to make the star. The suncatcher on the right side is folded 17 times per point. With 8 points, it is folded 136 times.

By playing around a bit with the size of the paper used for each point, the way that the points are folded, and then the final arrangement of the points – it’s possible to create a variety of different suncatchers.

I’m also working on a multi-week/multi-color quilt. Each quilt square will have a variety of fabric prints all in one color.  For each week of The Summer of Color challenge, I’m making two quilt squares.  Nothing fancy…just 7 rows of fabric of various widths. The final size of each quilt square is 12 inches x 12 inches. 

By the time the challenge is done, I’ll have 20 fabric squares – enough to make a nice size quilt while using up scraps of fabric.

Read Full Post »

Each month the Unique Women in Business (UWIB) team does blog hop. This month’s theme is “Red, White, and Blue.”

What immediately comes to mind for me is the 4th of July (also known as Independence Day).  There are plenty of parades, picnics, fireworks, and other events to celebrate the day.  But why are we celebrating it?

According to the History.com website:

July 4th has been a federal holiday in the United States since 1941, but the tradition of Independence Day celebrations goes back to the 18th century and the American Revolution (1775-83).

In June 1776, representatives of the 13 colonies then fighting in the revolutionary struggle weighed a resolution that would declare their independence from Great Britain. On July 2nd, the Continental Congress voted in favor of independence, and two days later its delegates adopted the Declaration of Independence, a historic document drafted by Thomas Jefferson.

From 1776 until the present day, July 4th has been celebrated as the birth of American independence, with typical festivities ranging from fireworks, parades, and concerts to more casual family gatherings and barbecues.

What are some ways to create a festive environment at home to celebrate the 4th of July? 

Reusable Fabric Bunting

This year, I made some red, white, and blue buntings to decorate the home and yard.  I made some extra ones that are available in my shop, Harvest Moon by Hand.

Red, white, and blue bunting
available at Harvest Moon by Hand.

Table Runner

In a past issue of Home Companion magazine, there was a picture of a table runner made from kraft paper that had flowers and circles cut from decorative paper sewn on with red thread.  I thought it would be nice to have something special for the table that is a bit more permanent.

So, I picked out tan linen fabric, red thread, fabric in red, white, and blue patterns. I cut out different sizes of circles and then sewed them randomly onto the fabric.  After that, I hand-embroidered each circle onto the fabric using the blanket-stitch.

Hand-embroidered table runner
with red-thread accent lines.

Origami Centerpiece

My daughters and I made this centerpiece by making origami cranes from scrapbooking paper, and punching circles from red, white, and blue scrapbooking paper.  We hung the cranes and circles on branches that were placed in a vase.  There are red and white glass pieces at the bottom of the vase.

Vase with Origami Cranes
Vase with origami cranes and
red, white, and blue paper ornaments.

Window Stars

I also like to decorate with red, white, and blue window stars.  There are many different patterns available at Harvest Moon by Hand including the trio of stars below.
The red, white, and blue window stars are available here:

If you would like to see what other women on the UWIB team created for the Red, White, and Blue Blog Hop, please visit the websites below:

Read Full Post »

Welcome to the second time of our Fun in the Summer Sun event!

Each Monday until September 7th
Mama to 4 Blessings along with Harvest Moon By Hand,
Adventures of Mommydom, Sweet Diva, and Sweet Phenomena
will be hosting Fun in the Summer Fun link up events.

Here’s the line up:
The 1st Monday of each month: link up your “Kid-friendly summer activities”
The 2nd Monday of each month: link up your “Kid-friendly summer crafts”
The 3rd Monday of each month: link up your “Kid-friendly summer recipes”
The 4th Monday of each month: link up your “How to stay cool in the summer heat”

*~*~*~*~*~*~*

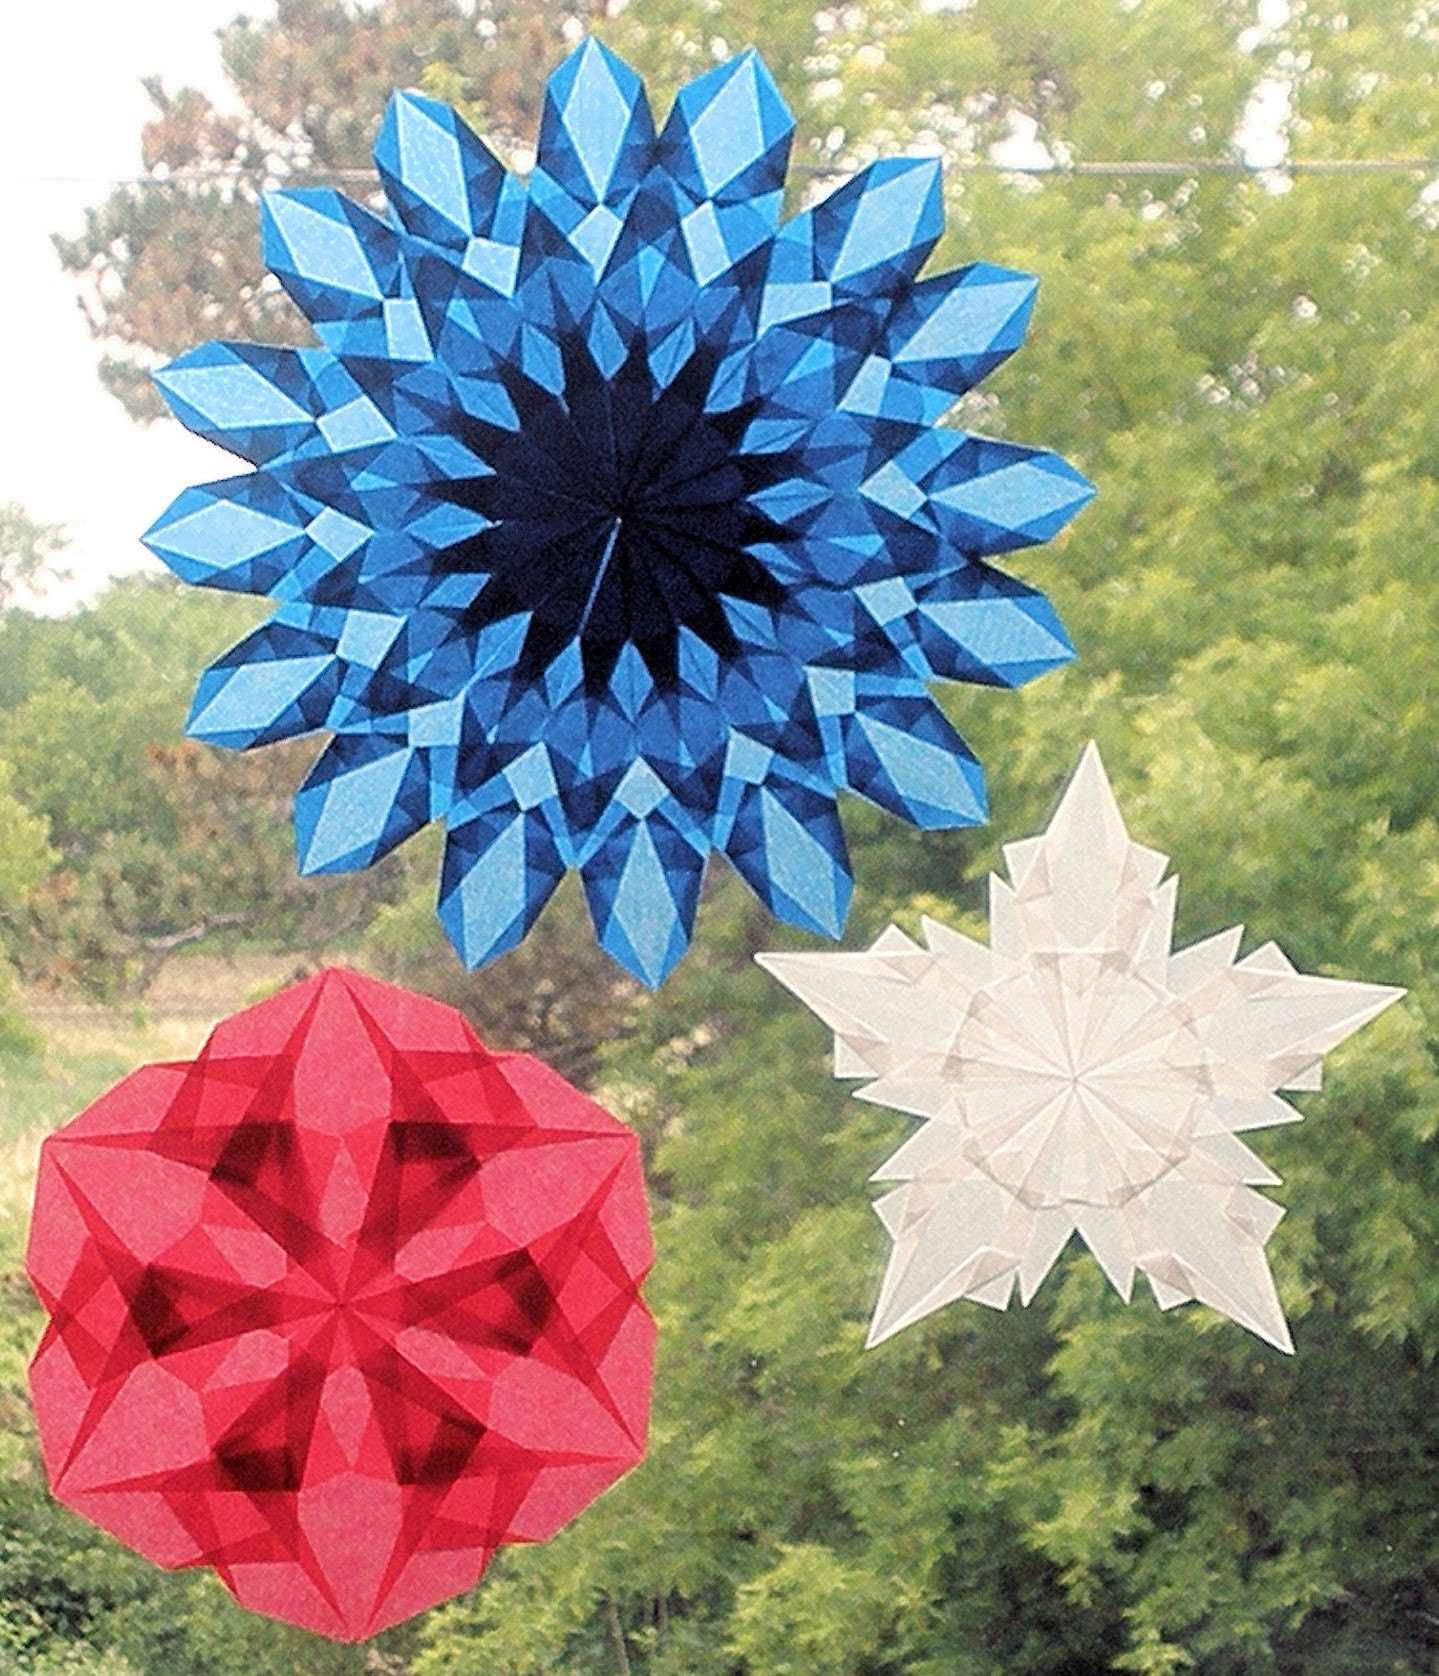
With the Fourth of July right around the corner, Sophia, Olivia, and I focused on creating crafts and decorations for the holiday.  I decided to take a Chinese spin on the holiday this year since there’s a Chinese connection with a symbol associated with the Fourth of July:  fireworks.

According to the Minnesota-China Connection website, “You may think that fireworks are as American as the Fourth of July, but we would not have them without Chinese inventiveness. The first fireworks might have been an accident. Legend tells that a cook discovered the ingredients for black powder, and quickly the Chinese were entertaining themselves with beautiful displays in the night sky.”

Also, origami (or paper folding) has ties to China.  Both China and Japan are countries that have a long history associated with origami.  This timeline shows the history of origami and paperfolding throughout the world.

With both Sophia and Olivia being adopted from China, having opportunities to link their birth- country and culture with American holidays and traditions, is important.

Here’s what we did:

Origami Crane Ornaments

Bare branches decorated with red origami cranes
and red, white, and blue circles.

We made crane ornaments from red scrapbooking paper as well as red, white, and blue circles (also from scrapbooking paper).  Hangers for the cranes and circles were made from a double-length of thread. 

At the bottom of the base, we put clear/white and red marbles.  Then, we inserted several bare branches.  The girls put the origami cranes and circles onto the branches. 

Sophia putting circle ornaments on the
origami crane tree.

Here are the instructions for making an origami crane:

The painting in the background behind the origami crane tree was hand-painted in China – not with a brush but entirely with his hand and fingernail.  The artist used the side of his hand or tip of the fingernail dipped in ink to create the image.  There was no design or pattern used to create the image – he just painted as he went along.  It’s a fascinating process to watch. 

Decorated Bags for Collecting Candy

A few bags that the girls made to collect candy
during the 4th of July parade.
I guess they wanted a spare bag just in case they
get a tremendous amount of candy.

Each year, we go to a parade on the 4th of July, and it seems like there’s always candy being thrown to the children.  The girls like to bring a little bag to collect the candy they pick up, so we made these bags from a variety of decorative papers and paper with Chinese printing/characters. 

The paper with Chinese characters on it is from a little booklet given out at a hotel in China.  It is from the last hotel we stayed in before heading back to the United States when Olivia was adopted.  It was in a collection of items that were brought back from China to show her when she was older.

The girls decorating brown bags with
scrapbooking paper and paper from China.

Origami Edibles

This idea came from the May 2011 issue of Family Fun.  Instead of crafting with paper, you craft with food and are able to eat it afterwards. For geometric wraps, simply trim flour tortillas into squares, spread them with fillings (e.g., peanut butter and raspberry jam; cream cheese and blueberry jam).  With red, white, and blue fillings – you have a great tie-in with 4th of July.

Olivia spreading peanut butter on
a whole-wheat tortilla. 
You could use a white tortilla
to make it fit the red, white, and blue theme.

For a puppy face treat, fold a square tortilla in half on the diagonal and then fold two corners in and down to make the ears.  You can make a face on the tortilla with fruit from the jam, olives, or food markers.

Sophia made a puppy PB&J sandwich
and used blueberries from the homemade jam
for eyes and a nose.
You can fold the tortillas any way you want – be creative!  Just make sure that you don’t put too much peanut butter, jam, or other filling on the tortilla or it won’t be able to fold properly.  Either that…or it will ooze out.  And that just doesn’t look as appetizing compared to treats with all of the contents inside them.
Sophia folded another sandwich in a different way.
It is kept closed by the stickiness of the peanut butter
(on the inside) and two strawberries from the jam
on the outside.

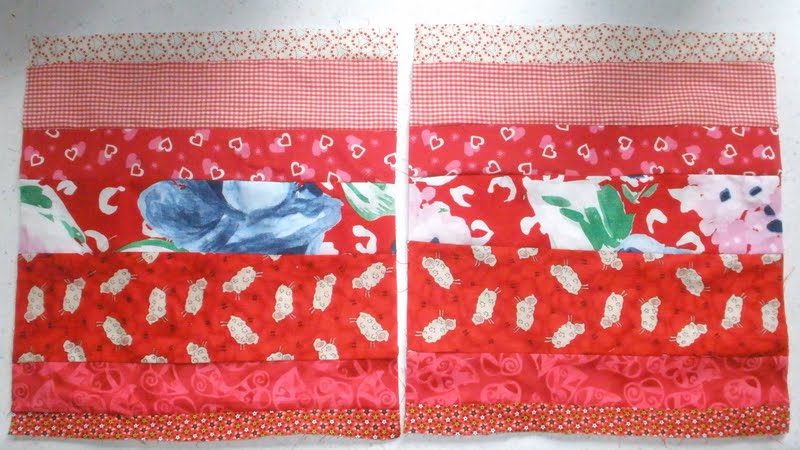
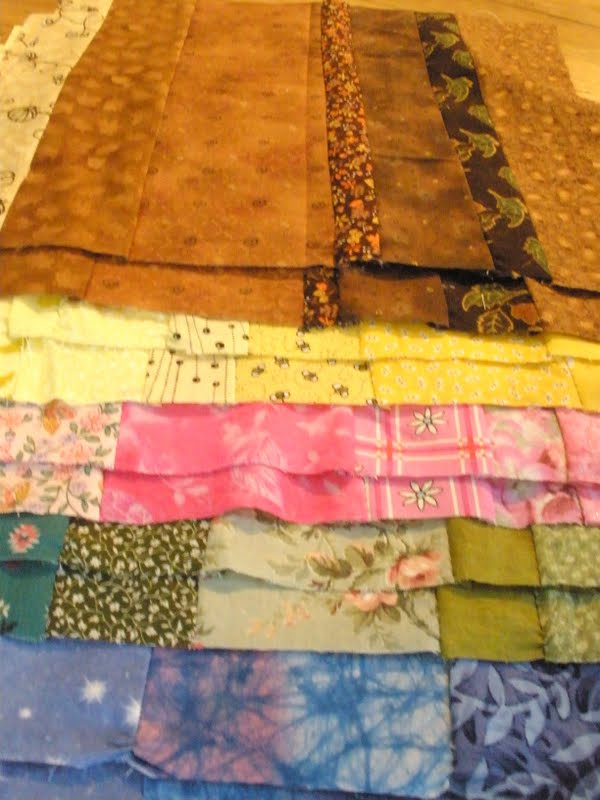
Besides getting ready for the 4th of July, the girls also worked on a couple of sewing and needlework projects this week.  Sophia made a lap quilt by trying six new quilting square patterns:

Lap quilt that Sophia made.
She learned six new quilting patterns.

Olivia looked through my sewing and embroidery patterns folder, and found a pattern to make a donkey.  The directions recommended sewing the donkey on the sewing machine, but Olivia wanted to sew it by hand using embroidery stitches she knew. 

Olivia using the blanket-stitch to sew her donkey. 
She completed it in less than a day.
It stands about ten inches tall.

The donkey is made from 100% hand-dyed wool felt and stuffed with wool from sheep I use to raise. 

The donkey that Olivia hand-sewed and
embroidered.  She used beads and sequins
to decorate the purple blanket.

She is so happy with the donkey she made, and now has a new stuffed animal with which she can play.

Now it’s your turn!
What is your Kid-friendly Summer Craft(s)?
We would love for you to share them!

Read Full Post »

FOR TODAY…

Outside my window…it’s still dark outside, but the trees are now visible against the snow.

I am thinking…I’m going to wait until Wednesday to begin the 30 Day Vegan Workshop.  It makes more sense to begin that day for me since I want to include a lesson about Shrove Tuesday/Mardi Gras today with the girls and make some food that ties into the day. 

I am thankful for…the quiet and peacefulness of the morning when I am the only one awake in the home.  (Well…I guess some of the cats and dogs are awake.  They go between resting and being awake.)

From the learning rooms…I’ll be concentrating on doing science lessons with Sophia and Olivia this morning. Also will be reading aloud part of The Landmark History of the American People to Sophia.  She’ll be reading aloud Om-kas-toe (a story from the Blackfeet tribe). Olivia will be finishing her unit study on Aesop’s Fables.  We’ll be learning about Mardi Gras and Shrove Tuesday today.

From the kitchen…I’ll be making pancakes for breakfast as a way to celebrate Shrove Tuesday (aka “Fat Tuesday”). According to Wikipedia, “Pancakes are associated with the day preceding Lent because they were a way to use up rich foodstuffs such as eggs, milk, and sugar, before the fasting season of the 40 days of Lent. The liturgical fasting emphasized eating plainer food and refraining from food that would give pleasure.  In many cultures, this means no meat, dairy, or eggs.”

I am wearing…a long-sleeve t-shirt, short-sleeve t-shirt, pajama pants, and warm socks.  It’s still morning…only 6:16 a.m.

I am creating…a yellow window star for a customer so I can mail it to her today. 

Gold Sunburst Window Star
This is the yellow window star that I’ll be making.

I am going…to hopefully use some gift cards to purchase a new dishwasher this week.  After doing dishes by hand for well over a month, it’s time for a new dishwasher.  Since I’m cooking three meals a day from scratch, there are a lot of dishes each day.  My time can be better spent doing other things that are more meaningful and have a greater impact.

I am reading…several books are “next in line” on my bookshelf:  Backyard Bird Secrets for Every Season – Attract a Variety of Nesting, Feding, and Singing Birds Year-Round  by Sally Roth; Parched by Heather King; and Home Safe Home – Proecting Yourself and Your Family from Everday Toxics and Harmful Household Products by Debra Lynn Dadd.

I am hoping…that today is a better day for my parents who have had some rather challenging days recently due to my dad having Alzheimer’s Disease and my mom caring for him at home. 

I am hearing…some new bird chips and calls.  I think some of the migrating birds are coming back now!  A sure sign of spring!!

Around the house…are projects that need to be done (as in repairs)…and projects that I would enjoy doing (sewing, embroidery, and cross-stitching). 

One of my favorite things…the land that this home is on.  I love seeing all the birds and wildlife that have made it their permanent or temporary home. 

A few plans for the rest of the week: organize my closet as part of the five-week Project Simplify challenge; take Olivia to the opthamologist for her quarterly appointment; go to the optometrist (for Sophia and me); and take out the bikes after the last snowfall melts this week so we can begin biking since the roads are now free from ice and snow. 

Here is picture for thought I am sharing…about a year ago at this time, there was no snow on the ground and the girls were wearing short sleeves outside.  Here they are taking Eenie for a walk around the backyard.  He was a good sport about wearing a collar and being led around by a leash. I think he was just excited to be out and exploring.

Are you a blogger? Go on over to the Simple Woman’s Daybook and join the blogging and read what others are doing!

Read Full Post »

Trio of miniature window stars

Today is the beginning of the monthly blog hop sponsored by Unique Women in Business. UWIB is a team of women business owners who are very supportive and encouraging of one another.  It’s a wonderful team of which to be a part, and I am happy to be a part of such a diverse and creative group of women.  (For all the team members, take a look at the UWIB blog.)

After the photos and information about the window stars, there is a list of team members’ names who are participating in the blog hop as well as links to their blogs. You can visit each blog to see the creativity of the team and how each person interprets the theme. This is a very diverse team, so it’s interesting to see the different materials used.

The theme for this month’s blog hop is “Something Green.” With Mardi Gras and St. Patrick’s Day both happening during March, I created a trio of miniature window stars.

This 4″ star is folded 16 times per point…for a total of 128 folds.

The window stars are made by folding a special kind of translucent paper multiple times per point and then gluing the points together to reveal a pattern.  In the window star above, for example, each point is folded 16 times before it is glued to the next point.  With 8 points, the star requires 128 folds. 

Each window star available through Harvest Moon by Hand has a different number of folds.  Some are very basic (like the dark green star which has only 5 folds per point) and others are very complex with over 25 folds per point. 

As noted above, the stars are all miniature versions of larger ones that are available at Harvest Moon by Hand. The stars are only 4″, 4.25″, and 6″ (10, 10.75, and 15 cm) in diameter.  The paper size for each point ranged in size from 1.5″-3″ (3-4.25 cm) square. 

To see green window stars that are currently available at Harvest Moon by Hand, please click HERE.

Be sure to check out the wonderful creations from the blog hop participants:

Participants

Karen Terry-McDuffie – http://www.jmjcreations.blogspot.com/

Robin Koehler – http://www.nestlingsbyrobin.blogspot.com/

Linda Reynolds – http://bellalindadesigns.net/

Birgitte Hendricks – http://sewdanish.blogspot.com/

Judy Woodley – http://www.wellspringcreations.blogspot.com/

Rita Wetzel – http://ritascreativenest.com/

Audrey F – http://audreygardenlady.blogspot.com/

Robin Maria Pedrero – http://www.pocketfullofcolors.blogspot.com/

Ann Rinkenberger – http://harvestmoonbyhand.blogspot.com/ (you’re here right now)

Trudy Miller – http://mommagoddesstreasures.blogspot.com/

Cory Trusty – http://aquarianbath.blogspot.com/

Cory Trusty – http://delicateadornments.blogspot.com/

Nancy Pace – http://nancyswildwirejewelry.blogspot.com/

Wendy Kelly – http://blog.vintageday.com/

May your blessings outnumber
The shamrocks that grow,
And may trouble avoid you
Wherever you go.
~Irish Blessing

Read Full Post »

Each year, the girls look forward to decorating the home for Valentine’s Day.  Last year, I made a variety of window stars that I put on the windows.  After the holiday, I packed them away to use again this year. 

It was so easy this year to decorate the main window in the dining room.  Here’s what it looks like:

As the girls and I looked through the bin of Valentine’s Day decor, we came across the paper cuttings I did last year for each of them.  One chose red paper as the backing and the other chose pink.  We hung the paper cuttings with a couple more window stars in the living room.

Since I just put out the winter nature table scene on the dresser in the dining room about a week ago, the girls and I decided to keep it up.  So this will stay up for a little while longer (perhaps right after Valentine’s Day it will be changed to another scene).

Winter Nature Table
Since we decided to keep the winter nature table where it was, Olivia suggested putting a Valentine’s scene on the bookshelf.  The table is more craft focused rather than nature focused since the winter nature table has the nature elements (e.g., rocks, sticks, pinecone, walnut shell beeswax candles). 

Valentine’s Day Items

The display on the bookcase has hand-embroidered gnomes made from wool felt and sheep wool stuffing from sheep who use to live here.  The elf clogs are hand-embroidered and made from wool felt as well.  I made a pair for each of the girls using their favorite colors.  The wet-on-wet watercolor lanterns are made from watercolor paper, kite paper, and tissue paper.  The girls made them a few years ago.  The two cards are handmade featuring origami designs made from Japanese paper. 

The picture is of Casey who died 3 years ago on the day before Valentine’s Day.  An artist painted the picture in exchange for some of my work.  It’s been a treasured picture…and one that has been the focal point of several displays.

I like to make a few new things each year, so this is a new window star I made.  It follows a base pattern that I use for another star, but I changed things up a bit to create a new pattern.  Here it is:

I also made a couple of miniature bears from a wool sweater that I felted in the washer/dryer.  The bears are holding a paper bunting with Valentine’s Day theme paper.  The bears are available in my shop, but I’m going to make another set so the girls have something else to decorate with in future years. 

Bears (made with a felted sweater) holding a bunting

The other item I just started making are bendy dolls with wire, beads, and wool felt.  I use a length of wire and two different size beads to create a miniature human form.  The clothes are hand-embroidered onto the wire frame.  The hat needed to be hot-glued onto the bead head in order to stay…otherwise it just slips right off.

I’m doing some for my shop as well as some for home.  The girls like them because they can bend and be posed in different ways.  Here is the trio of dolls that I made this weekend:

There are still a couple of weeks until February and some more things the girls and I want to do before then that relate to the holiday….more crafts, recipes to try, and activities to do.  Next week, I’ll post some more Valentine’s Day ideas.
Family room window with winter-white stars

Read Full Post »

Older Posts »