Feeds:
Posts
Comments

Archive for the ‘reuse’ Category

Today I made gift and candy pouches from ribbon scraps.  I’ve made gift bags from fabric and fabric scraps that I have had on hand, but never ribbon pouches.

To make a ribbon pouch, you’ll need 2-3 inches wide ribbon scraps. Align ribbons, perhaps pairing sheers with solids so the treats will be visible. Pin the lengthwise edges together.

Two pieces of ribbon pinned together and ready to be sewed.

Trim ends with pinking shears, and stitch together lengthwise. 

Sew the ribbons together along the lengthwise edge.

Cinch one end of the pounch with narrow ribbon or yarn. Slip in mints, gumdrops, or peppermint sticks. Tie the other end.

Completed ribbon pouches.
I’ve been wanting to do this project for a long time now, but it seems like when the holiday season arrives this gets put to the bottom of the priority list. By crafting in July for Christmas, it’s a way to enjoy the process of creating…without the pressure of the holidays.

Photobucket

Read Full Post »

There’s a ten-week challenge called The Summer of Color that’s on Twinkle Twinkle Like a Star. The Summer of Color encourages participants to focus on creating an item (or more) in a specific color each week.  Currently the challenge is on Week 3, but I wanted to start from the beginning and do all ten weeks. 

As I looked back on my pictures, I realized that I had already done two projects in the first week’s color (blue) during June. 

One was a blue bunting that will be for Olivia’s half birthday in July.  I had never made a bunting before, and wanted to see if I could make one.  I made two different versions – a red,white, and blue one for the Fourth of July; and the blue one pictured below.

What I like about making buntings is that it uses up scraps of fabric or reuses fabric that was for something else (e.g., bedsheet, shirt, pajamas).  At nine feet long, the bunting will add a decorative and festive touch to Olivia’s upcoming birthday celebration.
The other blue item I made was a tablecloth with puzzle pieces made from blue fabric. I selected about a dozen pieces of different fabric and cut out squares from each piece. Then, I ironed on the iron-on fabric adhesive to the back side of the fabic.
I traced 24 puzzle pieces from one of Olivia’s puzzle onto the adhesive backing and then cut out each puzzle piece.
I could have ironed this tablecloth before taking a picture of it.
Why create more work for myself?
It will be folded and then need to be ironed again
before Olivia’s 4-H demonstration in about a week.
Olivia placed each piece where she wanted them on the tablecloth (she is using it for a 4-H demonstration about making a jigsaw puzzle sandwich). I pinned and then ironed them in place. I asked her if she wanted me to machine stitch or hand embroider around each piece, but she liked the look of the tablecloth without the stitching.
The white fabric is some that I had on hand.  Again, it was a great way to use up some fabric and put it to good use. 

Read Full Post »

Over at Creating My Way to Success, Jill interviewed me about what I create and my definition of success.  I’ve included my interview below if you’d like to read it.

After you’re done at Harvest Moon by Hand’s blog, I’d like to encourage you to visit Creating My Way to Success.  I originally found out about Jill’s blog through her weekly “Round Tuit” post.  She features inspiring work made by several people each week, and then anyone can link a project they’ve completed (craft, cooking, or anything creative).

As Jill says, “…maybe it’s a project you’ve completed that you’re proud of – something you have wanted to get done for a while and need some extra motivation to get going on it – or you’d just like some of that fabulous encouragement, praise, and motivation that bloggers are so good at spreading around.”

She also has a section on her blog for clothes upcyling projects which over 100 people submitted projects to – including photos and tutorials.  It’s an excellent resource if you want to find a new purpose for old clothes…and make a positive difference on the environment.

After my interview, there’s a link for you to include your blog.  By visiting and following one another’s blogs, we spread the word about all the creativity out there…and countless inspiring ideas!

Here’s my interview with Jill (Jill’s questions are in bold type; my answers are in regular type):

What do you create?

When I think of what I create, I divide the items into three different groups:  things that I sell, share, or support. 

SELLING

My main way of selling some of the things that I create is through my shop on Etsy, Harvest Moon by Hand.  My goal is to help people enhance their homes by offering natural products which are calming and uplifting; and inspire creative and imaginative play in children.

Two Rainbow Window Stars
Window stars that are available at

I do this by:

– Creating handcrafted items made of natural, quality materials.

Beeswax Heart
Hand-poured beeswax impression
available at Harvest Moon by Hand.

– Creating imagination-inspired, eco-conscious items from materials that would normally be recycled thereby lessening the impact on the environment.

Wool Felt Bears & Bunting
Handmade bears with miniature bunting
made from a felted wool sweater.
Available at Harvest Moon by Hand.

SHARING

Another way that I create is sharing ideas through writing.  My blog, also named Harvest Moon by Hand, focuses on a variety of subjects, and gives readers a “behind-the-scenes” of what life is like at Harvest Moon and what provides the inspiration for its products. 

Mosaic of Needlefelted Alphabet ATCs and ACEOs - Tactile Art and Learning for Children
Set of needlefelted alphabet cards that I made
to help my daughters learn their letters
and corresponding sounds. 
The wool cards also can be used for spelling words.

Some of the topics I tend to write more about on my blog include: art, education, embroidery, family traditions, food/recipes, holidays, homeschooling, nature, reading, and sewing. 

August Journal Quilt without Border
Hand-embroidered journal quilt I made during 2010. 
This quilt is one of twelve that were made monthly for a year.
More information about the journal quilts and
what they symbolize are at Harvest Moon by Hand’s blog.

SUPPORTING

A third way that I create is by supporting my family by making or doing things for personal or family use. Some of the ways that I create on a day-to-day basis for my family are by:

– Making healthy meals and trying new recipes;
– Creating family traditions; and making good memories that the girls can look back on when they are older;
– Developing a personalized curriculum for each of my daughters based on their educational needs;
– Sewing clothes or quilts;
– Making sensory items and a memory quilt for my dad who has Alzheimer’s Disease;
– Making hand-embroidered toys; and
– Crocheting blankets.

Addy Unit Study - Sugar Cookies Round 2
I helped Sophia make sugar cookies one afternoon
after reading a book about a girl who made cookies.
She formed the dough into letters,
spelling the words “Family” and “Love.”

Why do you create?

That’s a good question.  In some ways, I think that asking me why I create is like asking me “Why do you breathe?” or “Why do you eat?”  Both breathing and eating are necessary to sustain life. 

I consider creating and creative expression – whether it’s a product, a memory, something to eat, a lesson plan, or playing a song on the piano – ways to sustain and enhance others’ lives as well as my own.  

Do you sell your creations? If so, how? Where?

I sell some of the items that I create through my shop (Harvest Moon by Hand) on Etsy.  What I enjoy about having a presence on the internet is that my work has been purchased by individuals and businesses throughout the world – including many states in the United States, Canada, Brazil, several countries in Europe, Australia, and Japan.

Rainy Day Activity Book - Button Flowers and Insects/Birds in the Garden
Pattern for a hand-embroidered activity book
available at Harvest Moon by Hand.

An equally important part of running a business is giving back to the community.  A couple of years ago, a local church asked me to make window stars for their fellowship hall/welcoming area.  I donated about 20 stars that they displayed in the windows around their Christmas tree.

Origami Window Stars at Church
One of the windows at a local church
where I donated some stars for
their Christmas display.
I also have made window stars, hand-embroidered ornaments, and other handmade items as “thank you” gifts for those who have made an impact on my life and who have indicated that they like the work that I do.  Sharing an item that I made by hand with someone who will appreciate it is something I enjoy doing.

What mistakes have you made or lessons you have learned?

I’ve made plenty of mistakes in trying to run a business. I do not have a business degree (my undergraduate degrees are in Psychology and in Communications, Telecommunications, and Theater; and I did some graduate work in Arts Administration), so I’m not as skilled as others who have a strong business background.  I’m learning as I go; and having Harvest Moon by Hand has taught me a lot about different aspects of operating a business from home.

Children learning taiko drumming from
a Theater Mu performer. 
This picture was taken during one of the
Create & Cultivate Art Camps
that I founded and directed right at the farm for many years.

One of the most important lessons, for me, is not to give up.  I’ve tried lots of different ways to be self-sufficient by running my own business or non-profit organization.  Some things were very successful (not neccessarily monetarily, but in terms of positive impact on others)…and others failed miserably on all levels. 

Campers petting one of the sheep at Harvest Moon.
The camp program drew children from a 50-mile radius;
and featured hands-on opportunities to learn
the connection between agriculture, the arts, and nature.

When faced with failure (or multiple, repeated failures as was the case many years ago when several things failed all within a few years of one another) life can get pretty discouraging.  I’ve had to step back at these times and objectively look at what was successful and what didn’t work, and come up with another idea, hoping that the new one would be the one that works well. 

What, to you is success? Have you achieved it yet, or are you on your way towards success?

To me, success isn’t related exclusively to money….it’s related to giving.  There are some core questions that are always in the back of my mind that guide how I view and work towards success:

– What are you doing to make a difference in the world? In your community? In your family?

– How are you making the lives of others who are having difficulty (or who have less than you do) easier?

– How are you enhancing the lives of the next generation? (These children are the ones who will be in charge when you are older…in business, government, and healthcare. Helping children now benefits everyone in the long-term.)

I know this is a very different view than some other people have regarding success.  Traditionally, success is equated with how much money you make and accumulate; how big a house you have; or how many “toys” you own.  Simply having lots of money and not using it to help others, to me, is not success.

My dream would be to have an even more profitable business – so that I could give more.  When I look at the opportunities to help…to make a difference…it would be nice to be able to have the financial resources to make gifts to others or travel to places to volunteer (beyond just donating items or time which my daughters and I do now on a weekly basis to various organizations). 

So what’s next?

I enjoy developing patterns, and would like to create more PDF patterns for natural, hand-embroidered children’s toys.

Felt Zebra on Green Wool
PDF pattern for a hand-embroidered zebra
available at Harvest Moon by Hand.
I also did a 52 Weeks of Baking challenge in which I tried new recipes each week for a year.  I modified the recipes so that they were dairy-free (so my oldest daughter could eat the food).  I typed each of the recipes along with modifications made, a photo of the recipe, and lessons learned during the week. 
My next step is to format the recipes into a book and print two copies – one for each of my daughters.  I’ve considered making some extra copies and trying to sell them since appetizing, dairy-free recipes for children aren’t always easy to find.
Sourdough Cinnamon Rolls
Sourdough cinnamon rolls that I made during
the 52 Weeks of Baking challenge.
They were incredibly good…and dairy-free!

Many years ago, I wrote a multi-disciplinary curriculum for families who homeschool that was based on creative reuse (it was called “Waste Not” and “Second Impressions”).  My daughters at the time were not old enough to do many of the activities over the ten-month period that I piloted the curriculum and activities to a local homeschool co-op. 

Handmade Pillowcase
Handmade pillowcase made from
a used (and cleaned) bedsheet and extra fabric.

So, I would like to revisit the curriculum, do the activities with the girls, and re-format the curriculum with pictures of the activities that my daughters enjoyed the most.  The photos of the projects, tutorials, and information would be available in PDF format through my shop. 

Wool Felt Cat Toys
Felted sweaters that were cut and
made into cat toys.

Read Full Post »

I’ve been wanting to make this dress for some time now after Olivia picked out a dress at Kohl’s this spring.  She liked the soft t-shirt top and cotton skirt of her new dress, and I thought it would be good for Olivia to have a few extra dresses to wear this summer. 

Olivia in the dress I made for her
using a shirt that was too short for her and
some extra fabric I had on hand.

Recently, Olivia told me that a favorite shirt of hers was too short when she lifted her arms over her head.  The rest of the top fit…it was just too short for her liking.  I had a piece of fabric on hand that was similar in color to Olivia’s top.  Asked if she wanted me to make a dress out of the shirt.  “Yes!” she answered.

I’m sure there are more efficient and professional ways to make a dress.  However, this is what I came up with that seemed to work for me.  The only thing that I wish I knew how to do was how to attach the piece of elastic with the curly edge which is around the waist of the Kohl’s dress. The Kohl’s dress also was made using a serger which I don’t have…just a standard sewing machine.

FIRST STEP: GATHER ITEMS YOU NEED

To make the dress, you’ll need one shirt and some fabric.  How much?  I have no idea.  That’s why the dress from Kohl’s is also out – to get an idea how much fabric is needed to make the skirt. 

You’ll also need a fabric scissors, pins, sewing machine, thread, bobbin, ruler, an iron, and ironing board.

STEP TWO:  CUT THE FABRIC FOR THE SKIRT

Iron the fabric, and then fold it so the folded edge runs vertically (the fold is on the right side in this picture).  Place a finished dress on top of the fabric, and spread the skirt out so the full width at the bottom is flat.  The edge of the skirt should be touching the folded edge. 
Allow an inch or so on the left side and at the bottom of the fabric; and then cut out so you have a rectangular piece of fabric.
STEP THREE: CUT THE SHIRT
Cut the shirt so that it is about a half inch longer than the shirt on the finished dress.  You could make the top longer or shorter…depending on where your daughter wants the top and skirt to meet. 
If you plan to make the top substantially shorter or keep most of the length, you may want to cut the top first and then the fabric for the skirt so the dress is long enough. (So, reverse steps 2 and 3.)
STEP FOUR:  SEW THE SKIRT

With right sides together, sew the length of the skirt (from waist to knees).  I used about a 1/4″ seam.  Press open the seam.

See step six (below) for a tip to make pinning the skirt and shirt together much easier.

STEP FIVE: GATHER THE SKIRT

Using two strands of thread, gather the top of the skirt about a half inch from the top.  Pull the thread when you get to the end a bit.  Adjust the gathering so it looks even.  (Note to self:  Working in the garden before sewing doesn’t make for good pictures.)
STEP SIX: PIN TOGETHER THE SHIRT AND SKIRT
Turn the shirt and skirt so the right sides are together.  To pin the skirt to the top, match one side seam of the shirt with the sewn edge of the skirt.  Pin it together.  (Make sure you are pinning the right sides together – you have to kind of lift the skirt and shirt up a bit and then pin it.)
In retrospect, what I would have done back at step four is mark the skirt in four equal parts along the waist.  I also would have marked the shirt in four equal parts along the cut edge.  In this way, the four markings could be matched and pinned. Then, the gathering could be spread out equally within quarters. 
As a side note, the white “fake shirt” that’s inside the pink shirt was taken out by a scissors at this point.  Olivia didn’t like the feel of it and would have been bothered by it. 
STEP SEVEN: SEW THE SHIRT AND SKIRT TOGETHER

With a 1/2″ seam allowance, sew the skirt and shirt together.  Take your time…it’s easy for the skirt or shirt to get under the needle.  The last thing you want to do is take out your stitching.  Trust me…I’ve done that before.  It’s not fun…especially with gathered skirts.
STEP EIGHT:  DO SOME IRONING AND HEM THE DRESS
Iron the dress – or just the skirt part – again.  It’s probably fine from the last time you ironed…but just in case there’s a crease somewhere:  you can flatten it beyond recognition. 
Then, you need to hem the skirt to the desired length. I wanted to hem my daughter’s dress 1/2″ so I folded it up 1/4″ and then ironed it.  Then I folded it again (so 1/2″ was turned up).  Pin the hem as you go.  Sew the hem.
Turn the dress inside out….and now you’re done. 
It’s an easy project…it doesn’t take a lot of time…and it’s a great way to reuse a shirt and use some fabric for which you haven’t yet found a use. 
So that’s my first tutorial.  Hopefully it was clear enough through the pictures and/or words.  If not, let me know…perhaps I can better explain what I did.
The finished dress…and a daughter who’s happy
she has another outfit to wear.
 

Read Full Post »

Finding clothes that fit Sophia properly has been a challenge during the current and past few seasons (spring, winter, fall).  She will be going into 5th grade this summer (we homeschool year-round), and has already had a major growth spurt that has made her too tall/large for fitting into children’s clothes.

When Sophia and I have looked at the next size up (juniors), the majority of the clothes are not appropriate for a child to wear.  The necklines are cut way too low, the tops are often too short, the skirts too short, and the pants too long.  It’s incredibly difficult to find clothes that are comfortable to wear and reflect the age of the wearer. 

So, when I saw that there’s a Kids Clothes Week Challenge (KCWC) on Elsie Marley’s site, I thought it would be a great opportunity to make the time to sew some clothes for Sophia.

KCWC is (obviously) a one-week time period where participants commit to sewing for one hour a day for 7 days. The purpose is to sew clothes for children (one’s own or other people’s kids). 

I’m thinking that it also would be a good week to make at least one item to donate to a child in need.  There are a lot of programs out there that welcome handmade clothes for children (e.g., pillowcase dresses for girls in developing countries, hats for newborns)

Olivia in the Pillowcase Dress for Little Dresses for Africa
Olivia showing a pillowcase dress I made for
Little Dresses for Africa.

The KCWC challenge says that knitting and crocheting are fine as well as pattern making, fabric cutting, and seam ripping.  I think my main focus will be on sewing (rather than on knitting and crocheting) since the weather will be hot in a matter of months. 

The last time I sewed for the girls, I made each of them a dress for their First Communion.  My mother (who made a lot of clothes for my sister, brother, and me when we were children and teenagers) helped guide me in putting in the zippers, making sure the sleeves were done right (and comfortable to wear), and ruffling the skirts and attaching them to the bodice of the dress.  I hand-sewed over 200 clear beads onto each of the dresses to embellish the bottom part of the dress and make them a bit more special for the girls.

Sophia and Olivia in their First Communion Dresses
Sophia and Olivia in dresses
I made for them.

The next step in the KCWC is determining what items would be most useful and worn during the summer; and picking out patterns and fabric. I’ve taken a look at the Flickr group that shows clothes that people have made (HERE), and saw some cute ideas.  There were some ideas for “re-inventing” clothes and giving them new purpose (e.g., jeans made into shorts).

blue jeans to shorts
Jeans to shorts made with homemade bias tape.

I’m thinking that it may be good for Sophia and Olivia also to learn how to make something easy – perhaps a skirt – so they can learn some basic clothes-making skills as well.  They could also learn how to do applique on clothes. 

One woman who did the KCWC challenge last year embellished a new top that had become immediately stained with food.  She did some cute applique work that covered the stains so she didn’t have to throw out the shirt. 

IMG_9378 Applique T-Shirt
Applique shirt that was made to cover stains on a shirt
so it could be worn and not thrown away.

As the KCWC website says, “A lot can happen in a week if you put in a little time each day. And with hundreds of people sewing along with you and cheering you on, well, you can’t help but make great stuff!” 


Read Full Post »

Hot Spot #4 for Project Simplify’s five-week challenge was focused on the pantry and refrigerator.  Since I did some major cleaning and organizing of the cupboards for the 30 Day Vegan workshop, I chose to focus on the refrigerator for this challenge.

This challenge came at a perfect time.  I had some gift cards that I had been saving, and now could get a new appliance with them.

It was time to get rid of the 12-year old refrigerator that no longer had the bins for fruits and vegetables, the shelf propped up with a knife, and the shelves on the door held on with duct tape.  Although it was still working, it was not an energy-efficient appliance. 

The challenge with finding a new refrigerator is that I have 28″ of space available.  The door leading to the kitchen is only 29″ wide and the space in the kitchen for the refrigerator is 28″ wide.  There are not many refrigerator/freezers out there that are so narrow.  It is quite limiting.  In fact, there was only one model that fit into the space. 

The morning that the refrigerator/freezer was being delivered, I took one last look at the one I used for over 12 years:

Very crowded and disorganized refrigerator.
Notice the missing bins, shelf being held up with a knife,
and the shelves being held with duct tape.
It’s time for a new refrigerator!
The freezer with absolutely no
organizational system.
The freezer shelves in the
old refrigerator/freezer.

I transferred all items from the freezer to the large freezer in the mudroom.  All the magnets, artwork, and photographs came off the sides of the refrigerator.  Some of the business magnets or ones that had seen better days immediately went into the trash.

When the delivery men arrived, I unloaded all the items from the refrigerator.  They set up the refrigerator/freezer and took the old one away. 

As I began putting items into the new refrigerator, I checked all expiration dates to make sure items were still okay to use.  Anything that hadn’t been used in awhile (on the door shelves), I threw away the contents and soaked the bottles to get the labels off. (I reuse the glass bottles to hold homemade dressings and food I buy in bulk at the co-op.  I’m trying to get away from using plastic, but it’s a slow process making that transition.)

I picked some items from the big freezer to put into the new freezer – like juices; butter (dairy free and regular); a variety of frozen vegetables; frozen fruit that the girls and I picked during the summer and froze; a couple packages of meat; and a few containers that have food that can be re-heated (e.g., stuffed peppers). 

Here’s what the refrigerator and freezer look like now:

The new refrigerator/freezer with
only the items that I’m going to use. 

It is so much easier to find things now, and only the items that I’m going to use are in the refrigerator and freezer.  It’s been a few days now since I did this, and it has been wonderful to have a fully-functional and working refrigerator/freezer. 

When I’m making 21 meals a week (breakfast, lunch, and dinner since the girls are homeschooled and we eat all our meals at home…unless we are helping my parents and they want to take us out for lunch), having an appliance that works and is in good order is nice.  It makes meal preparation so much more enjoyable!  Truly, it is simple things like this that make me happy.

Read Full Post »

This week I continued working on the 30 Days to Simpler Life project. Each day, Fairy Tale Mama at Enchanted Schoolhouse posts an activity from the book 30 Days to a Simpler Life.  

The projects so far have been ones I’ve wanted to do, but haven’t made the time for…or ones that weren’t on my list of things to do, but have been good to do in an effort to de-clutter and simplify my life.  Here are the actions for the past week:

Day #15 – Today seek, sort, and organize the keys to everything in your life—cars, boats, bike locks, gates, sheds, houses, and offices. Purchase key labelers and rings and make duplicates, if needed. Finally, create a place just for keys. Install a rack or board with pegs or nails and label it so missing keys can be identified. This system works well for duplicate and seldom-used keys.

For everyday keys, we have three suggestions: 1) Put a basket by the front door for family members to deposit their keys. 2) Hang a hook inside your entry door. 3) Provide each family member with his own complete set of keys. (30 Days to a Simpler Life, p. 93)

Having hooks for keys was something that I put inside my kitchen cupboard many years ago because I was constantly misplacing keys.  After coming through the mudroom, the kitchen is the next place people enter.  Since keys were often just tossed on the counter, it made sense to have a place to hang them when coming in from outside. 

What I didn’t do was label each key hook which is a good idea.  So, I did that this week.

Key hooks with labels

In this process, I went through all the keys in the kitchen drawer (over a dozen) and tried them on the locks on the doors.  None of the keys matched any of the locks, so I threw them away. No point in keeping them when they don’t open anything.

Day #16 – Declutter your desktop and surrounding counters. Spend at least an hour sorting and tossing. Make your work space the most efficient area in your life. Clutter is especially annoying when it is on your desk or in your office. (30 Days to a Simpler Life, p. 100)

Normally my desk does not look like this.  In the process of cleaning over the past 15 days, I have simply dumped items onto the desk that need action in the short-term.

Desk before cleaning. 
It’s become a dumping ground during the cleaning process. 
(Again…this is not representative of what my desk normally looks like.)

My goal was not simply to clean it and put the items in a pile or file folders.  I wanted to look at each piece of paper and take some form of action on it.  At that point, the paper could then be filed or recycled.  After I was done, my desk looked like this:

My desk…after.

Day #17 – Organize your computer life.  To simplify your computer life, make three piles: pile one, manuals; pile two, floppy discs and CD-ROMs; and pile three, registration materials and bills of sales. Read on to discover how to handle these piles. (30 Days to a Simpler Life, p. 111)

I had some boxes and computer discs on my desk which were just taking space.

Computer disks and program boxes
taking up space on my desk.

In addition to these items, I don’t have a tremendous amount of manuals and registration materials so I was able to place them all in a bin.  The floppy disks and CD-ROMs are all together now. 

Bin with computer disks and programs.

Day #18 – Go for Financial Freedom – To achieve financial freedom, first figure out what you have and then manage it well. Today, collect your documents that are associated with large assets—documents for your car, house, investments, and so on—and put them in one filing cabinet called Assets.

For your house: file your deed, purchase contract, closing papers, title policy, and insurance papers. For your investments: file confirmations, year-end statements, and tax reporting forms. For cars: file ownership papers, registration documents, and insurance papers. (30 Days to a Simpler Life, p. 116)

Rather than follow what was recommended, I am continuing to use the system I have set-up.  All the important papers regarding the house are located in the safe deposit box at the bank (e.g., deed, purchase contract, closing papers, title policy). To me, this is the best place to keep documents that there is only one copy of and that are critically important.  For the home owners insurance policy information, I have a file in my desk.

For investments, I use to put them in my files in my desk.  However, I realized that it might be easier (if anything happened to me) to have everything in a 3-ring binder. When I did filing last month, I shredded all old paperwork and kept only the most recent statements for all investments, bank accounts, insurance policies, etc.

This binder is the second item in my desk drawer (the first item are receipts and paperwork for 2011 income taxes).  In this way, the most critical paperwork is located in an easy-to-find spot.

For the car, everything is in one file folder in my desk. 

Day #19 – Run Fewer Errands – Today, create a box for errands. You can use a great-looking basket, plastic tub, or shopping bag. Whatever works. Keep it by the door and fill it with film to be developed, shoes to be repaired, purchases to be returned, and papers to be taken to the copy center. On errand day, take the box in the car. When you come home, it will be empty. What a feeling! (30 Days to a Simpler Life, p. 123)

Since I live about 14 miles from the closest town that has the public library, grocery stores, Target, and other stores where I get household items, it is – by necessity – that I’ve grouped errands for the past 15+ years. 

In the kitchen, the washer/dryer unit is built so that there is a space for the top-loading washer to open.  I’ve placed my bag as well as items that needed to be taken for errands there.

Generally, I put items in cloth bags for each location where I need to go (e.g., one bag for books/CDs/DVDs that go to the library; one bag for books that need something photocopied).

My bag plus two bags for errands
(each bag has items that go to different locations).

The mudroom also has a bag for items that are going to be donated.  Whenever someone comes across something that is no longer needed or wanted, or no longer fits, it goes into the donation bag.  When the bag is filled, it goes to Family Pathways (the non-profit thrift shop). 

Day #20 – Be Mindful, Savor Time – Today, practice living in the present—not in fast forward or reverse. Do one mundane job with your full attention. When you pay attention in your daily life, whatever you do becomes transformed.

Step 1. Sit still for a few minutes before beginning the next activity on your To Do list. Focus on your breathing. When you feel calm, centered, and grounded, turn your attention to your task. Next, walk slowly to the site of your task.

Step 2. Now do the job slowly and deliberately. Perform this act as if it were your last.

Step 3. When mental and physical distraction arise, remind yourself to refocus. If the interruption is about something you must do later—such as calling the plumber—write it down and return to your chore. (30 Days to a Simpler Life, p. 131)

I tried doing this a few times during the day, the first time being when I was organizing homeschooling resources.  I was going through my closet and bookshelf in my office to look at the curricula and books that I have for the girls’ education.  My goal is to go through everything before the homeschool conference this month so I know what I have on hand so that I’m purchasing only what I absolutely need for the 2011-2012 school year.

As I was dividing the curricula and books into different categories (e.g., use for next year; sell at upcoming curriculum fair; donate; books to read this year), I found it was easy to do the job slowly and deliberately because I needed to looked at each resource and make a decision. 

Since my mind was focused on the task at hand – and there was a purpose to it – I didn’t find that there were mental distractions.  I did have a few other distractions (e.g., cats exploring what I was working on, Olivia asking what I was doing and expressing interest in starting the Character First! curriculum right away).

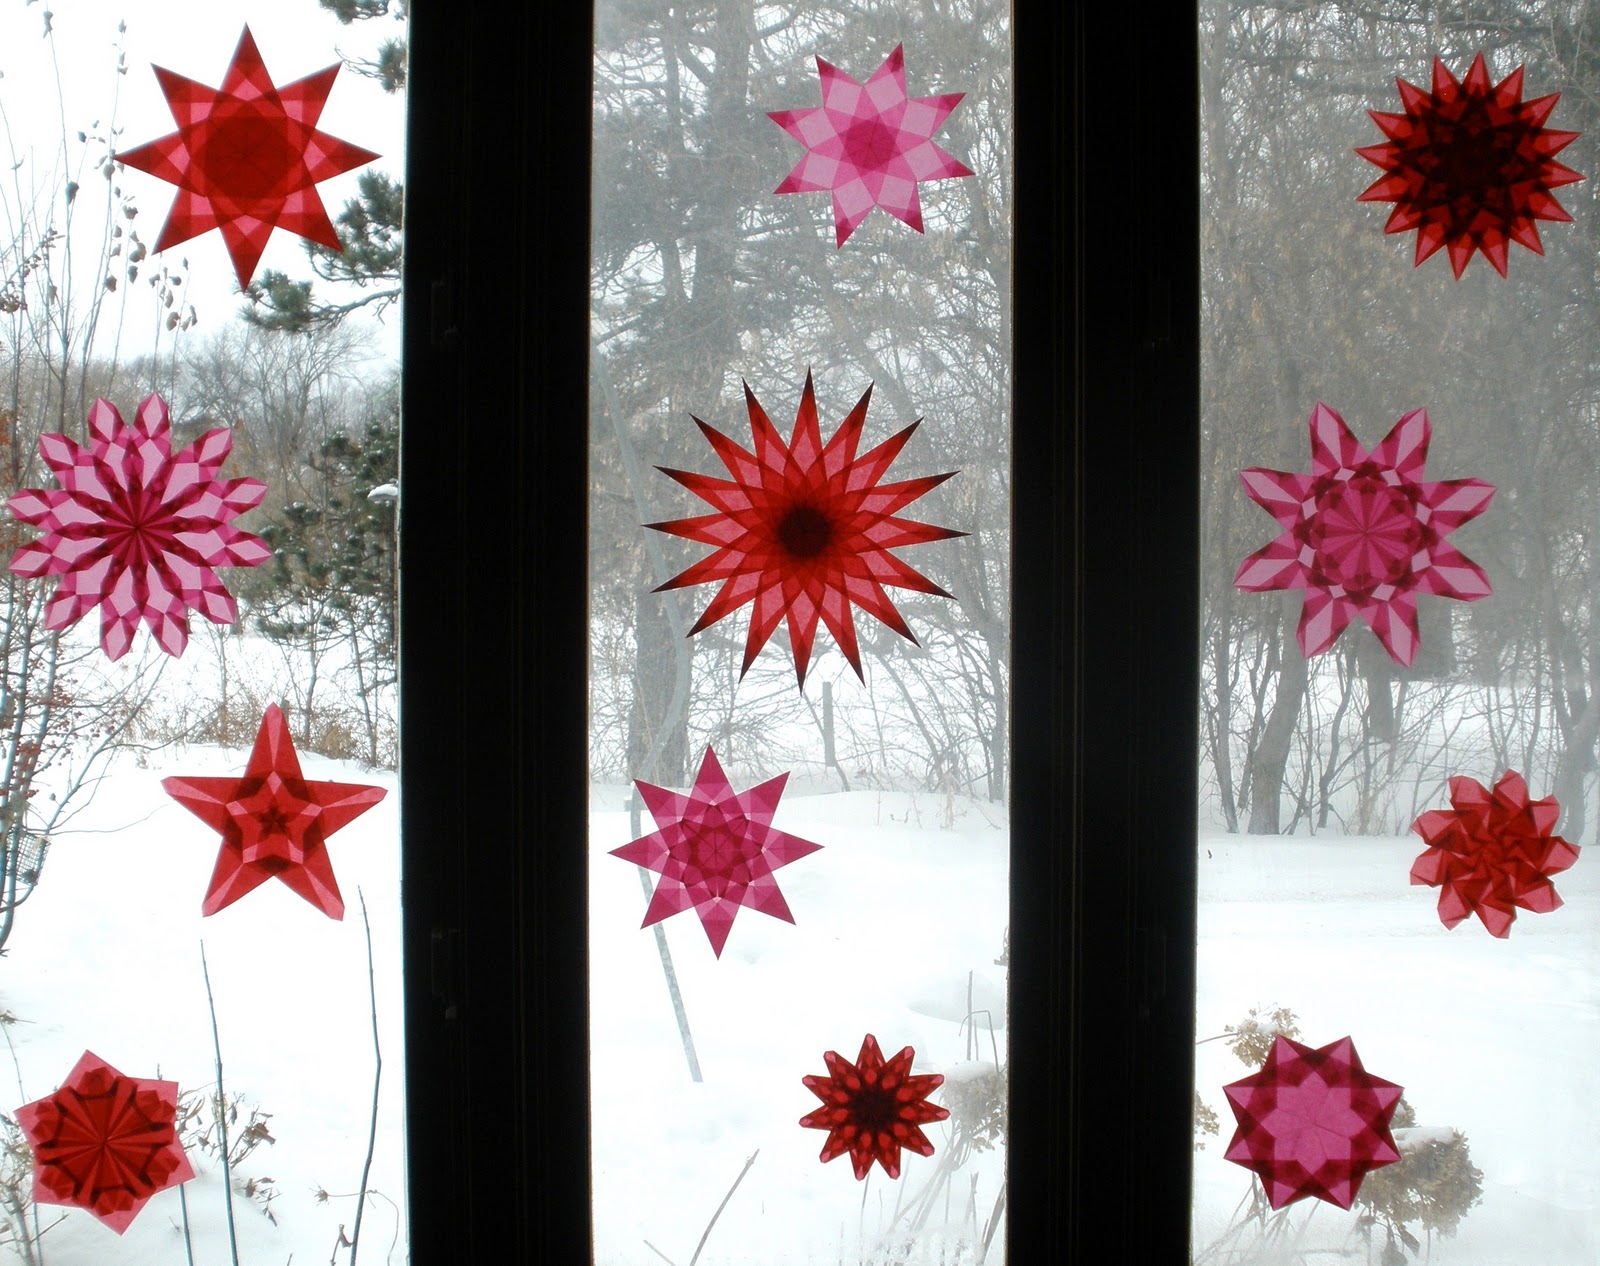
Another task that I did that I enjoy, but is mundane in that it is repetitive and doesn’t require much mental concentration, is making window stars.  I had several orders that I needed to complete today.  Since I have made each of the stars that were ordered many times, I found it difficult to “practice living in the present.” 

I kept thinking of things that needed to be done (e.g., call about my parents’ long-term health care insurance, fill out my dad’s V.A. paperwork, do the laundry) or was interrupted with questions from the girls regarding what they were working on (e.g., “How do I reduce this fraction?” “Could you check my long division?” “I need help with the ‘short e’ page?” “What do I do on this page?”).

Spring Rainbow Star
One of the window stars I made today.

Day #21 – – Travel Light in Style – Set up a Travel Center today. Include travel lists, travel documents, travel accessories, frequent flyer information, travel destination files, and books on travel. (30 Days to a Simpler Life, p. 136)

Travel Center:


Put your travel phone numbers (airlines, frequent flyer numbers, passport numbers, etc.) in one place.


Make permanent travel lists for what to pack, thing to do before you leave, house sitter instructions, household operations (e.g. how to run the sprinkler system, the alarm system, etc.), and medical release forms for your children for caregivers.


Put all your travel accessories (e.g. earplugs, eye shades, neck pillows, etc.) in one place.


Make travel folders for frequent flyer miles and trips (i.e. upcoming trip, trips I’ve taken, trips I’d like to take).


Create an area for travel books.

I use to travel a lot more than I do now.  To make things simple, I use one airline and have one frequent flyer number.  In this way, points accumulate on one number and result in free airline tickets quicker rather than flying multiple airlines and spreading miles across different numbers/airlines.

At this point in my life, traveling is a luxury which I wish I could do. I have no trips scheduled requiring air travel or being gone an extended period of time (more than a few days).  Thus, I didn’t want to spend much time with this activity only because there are other things that need my attention at this time. 

However, I do have a file folder filled with magazine clippings of places I would love to travel to someday.  Some of the destinations are within the state, but many are places much further away (domestic and international) that I hope to be able to visit at some point in the future. 

When I was cleaning my office closet, I found some travel books from AAA, but they were outdated and from a trip that I took many years ago.  I recycled them since they were more than a few years old, and I do not plan on returning to that location in the immediate future.

Two books that relate to education and travel.

I did find two books on the bookshelf in my office that related to travel, so these are now together on the shelf.

Read Full Post »

Over at Show Tell Share, there’s a challenge for February:  STASH!  The challenge is to “…use materials from your overflowing stash of stuff. …. So go ‘shop the house!’ Create something beautiful out of what you have laying around!

“You may have to go buy just a little something, button, zipper, etc. to complete a project, but extra points it you can pull it of without buying anything.

“And you don’t have to stop with one, see how much of your stash you can put to good use! You can make something completely from start to finish, or see how many of those half finished projects you can complete and show off! Then at the end of the month, you’ll have so much extra room in your craft room/closet/bins.”

This sounded like a great challenge to participate in – not only am I saving money by not buying new craft supplies, but I’m using what is on hand and creating space.  Below are some things I have made so far this month.

*~.:.~*~.:.~*~.:.~*~.:.~*~.:.~*~.:.~*~.:.~*~.:.~*

I had a couple of maps that I didn’t need – one from Brazil and another from Spain.  The one from Brazil is written in Portuguese and was purchased there about a decade ago.  The other map is from a National Geographic magazine. What I like about the latter map is that there are short explanations about the significance of some of the cities or towns on the map. 

With the Brazilian map, I made folded flowers that I glued onto 5 inch by 7 inch greeting cards. 

Flower made from a Brazilian map and green copy paper

Open flower where a message can be written

The matching envelopes have a floral image from the map to tie the greeting card and evelope together.

Greeting cards and envelopes made from the Brazilian map

With the map of Spain, I made two type of miniature cards (they are 3 inches x 3 inches).  The cards themselves are made from sheets of 12 inch x 12 inch scrapbooking paper.  For some of the cards that had an interesting fact, I left the cards plain. 

Miniature greeting and thank you cards

With the cards that didn’t have a fact, I placed a hand-stamped “thank you” flower in the center.  It is affixed to the card with a 3D double-sided foam piece.

*~.:.~*~.:.~*~.:.~*~.:.~*~.:.~*~.:.~*~.:.~*~.:.~*

I had quite a few vintage children’s books on hands that the girls were done reading.  They had cleaned their bookshelves about a month ago and removed all the books they no longer wanted.  Before donating them to the local thrift shop, I pulled any vintage books that could be used in crafting. 

After removing the pages that had pictures, I traced an envelope template onto each page.  I cut each one out by hand; and then folded and glued it.  I pressed the envelopes under a couple of heavy books to flatten them.

Variety of handmade envelopes from vintage children’s books

With some of the books, the pages are a bit small for standard-size envelopes, so I made gift bags with the pages.  Again, I use pages with pictures for the bags.  After removing the pages from the books, I pair pages together and then trim them so the edges match.  The edges are cut with pinking shears.  The edges are sewn on the sewing machine.

Handmade Bags with Vintage Children's Books
Gift bags made from vintage children’s books

*~.:.~*~.:.~*~.:.~*~.:.~*~.:.~*~.:.~*~.:.~*~.:.~*

I have a lot of scrapbooking paper and notebooks that are taking up shelf space.  An idea to use both of these were to make letterettes.  I received a set of letterettes from someone on Swap-Bot awhile back.  I thought it was such a clever idea.  She used a heavier decorative paper (almost like a cardstock) for the exterior.  Since I didn’t have patterned cardstock on hand, I used a lighter-weight decorative paper.

Letterettes

The patterned paper is 12 inches by 12 inches.  I cut the paper into two pieces – one that was 5 inches wide and the other was 7 inches wide.  The length is 12 inches.

The inside of each letterette has 5 sheets of notebook paper that were cut into smaller sizes:
– Smaller letterette:  4 7/10″ x 7 3/4″
– Larger letterette: 6 7/10″ x 5 7/10″

Letterettes – with one open to show where it is sewed

Once cut, they pages were folded in half and placed in the folded patterned paper.  I sewed on the sewing machine along the folded line in the notebook paper, making sure to reverse sew along each of the edges so the stitching wouldn’t come out.  After trimming the thread, the letterettes are ready to use.

After writing a letter on the notebook pages, simply seal the letterette with a glue stick or decorative tape, put two labels on the outside – for the return and sending addresses – and it’s ready to be mailed.   

*~.:.~*~.:.~*~.:.~*~.:.~*~.:.~*~.:.~*~.:.~*~.:.~*

I had a gift box that had a nice pattern on it, but I am now using fabric bags to wrap gifts.  So, instead of recycling it I used my tag punch and paper punch with a tiny hole to create tags.  Using a thicker embroidery floss, I cut and attached hangers so they can be used for gifts or for price tags for products. 

Tags made from a decorative box

*~.:.~*~.:.~*~.:.~*~.:.~*~.:.~*~.:.~*~.:.~*~.:.~*
I had a few pages from the vintage children’s books leftover as well as some notebook paper.  So, I made some made stationery gluing a sheet of notebook paper on top of a page from the children’s book.  I had debated about painting over the image that’s under the notebook paper, but I thought that it was nice to be able to see the design of that page of the children’s book as well as the image on the backside of the stationery.
Stationery with notebook paper and a page from a children’s book

*~.:.~*~.:.~*~.:.~*~.:.~*~.:.~*~.:.~*~.:.~*~.:.~*
My next focus:  using the fabric and felt that I have on hand.  I have quite a few patterns that I’ve wanted to try that use these materials. So, during the next couple of weeks I’ll start using sewing or embroidering using felt and fabric.  I’ll do another post at the end of the month with what I’ve made.


Read Full Post »

Each year, the girls look forward to decorating the home for Valentine’s Day.  Last year, I made a variety of window stars that I put on the windows.  After the holiday, I packed them away to use again this year. 

It was so easy this year to decorate the main window in the dining room.  Here’s what it looks like:

As the girls and I looked through the bin of Valentine’s Day decor, we came across the paper cuttings I did last year for each of them.  One chose red paper as the backing and the other chose pink.  We hung the paper cuttings with a couple more window stars in the living room.

Since I just put out the winter nature table scene on the dresser in the dining room about a week ago, the girls and I decided to keep it up.  So this will stay up for a little while longer (perhaps right after Valentine’s Day it will be changed to another scene).

Winter Nature Table
Since we decided to keep the winter nature table where it was, Olivia suggested putting a Valentine’s scene on the bookshelf.  The table is more craft focused rather than nature focused since the winter nature table has the nature elements (e.g., rocks, sticks, pinecone, walnut shell beeswax candles). 

Valentine’s Day Items

The display on the bookcase has hand-embroidered gnomes made from wool felt and sheep wool stuffing from sheep who use to live here.  The elf clogs are hand-embroidered and made from wool felt as well.  I made a pair for each of the girls using their favorite colors.  The wet-on-wet watercolor lanterns are made from watercolor paper, kite paper, and tissue paper.  The girls made them a few years ago.  The two cards are handmade featuring origami designs made from Japanese paper. 

The picture is of Casey who died 3 years ago on the day before Valentine’s Day.  An artist painted the picture in exchange for some of my work.  It’s been a treasured picture…and one that has been the focal point of several displays.

I like to make a few new things each year, so this is a new window star I made.  It follows a base pattern that I use for another star, but I changed things up a bit to create a new pattern.  Here it is:

I also made a couple of miniature bears from a wool sweater that I felted in the washer/dryer.  The bears are holding a paper bunting with Valentine’s Day theme paper.  The bears are available in my shop, but I’m going to make another set so the girls have something else to decorate with in future years. 

Bears (made with a felted sweater) holding a bunting

The other item I just started making are bendy dolls with wire, beads, and wool felt.  I use a length of wire and two different size beads to create a miniature human form.  The clothes are hand-embroidered onto the wire frame.  The hat needed to be hot-glued onto the bead head in order to stay…otherwise it just slips right off.

I’m doing some for my shop as well as some for home.  The girls like them because they can bend and be posed in different ways.  Here is the trio of dolls that I made this weekend:

There are still a couple of weeks until February and some more things the girls and I want to do before then that relate to the holiday….more crafts, recipes to try, and activities to do.  Next week, I’ll post some more Valentine’s Day ideas.
Family room window with winter-white stars

Read Full Post »

The theme this week for Muffin Tin Monday is “Favorite Foods.”  I’ve been serving dinners each Monday night for the past several weeks in muffin tins.  However, I was doing a lot of baking and cooking on Sunday and thought it would be good to do a muffin tin meal for Sunday night’s dinner.
“It’s not Monday, Mom!” Olivia said.
“Yes, that’s right.  It’s Sunday,” I replied.
“Well…you always do the muffin tins on Monday…not Sunday.”
Hmmm….I guess I didn’t realize that the girls had come to expect a muffin tin dinner every Monday night.  How quickly routine can set in…and something for them to expect and to look forward to each week.
“Favorite Foods” Muffin Tin Meal
This week’s Muffin Tin Meal includes the favorite items:
Top Row:  Banana bread, deviled egg, Chex mix, chicken salad
Middle Row: Carrots, celery with peanut butter and raisins (aka “Bumps on a Log”), orange slices, homemade pizza dipping sauce
Bottom Row: Rice Krispie bar, brownie, cheese stick cut into small bits, foccacia (to go with the dipping sauce)

Here’s another (crooked and dark) view of the muffin tin from above:

The girls enjoy freshly-baked bread, so when I saw a recipe for foccacia in the new Taste of Home magazine, I wanted to try it.  I’m going to add the recipe to the 52 Weeks of Baking cookbook I’m writing for Sophia and Olivia.  The bread itself is very easy and flavorful. 
The toppings, as called for in the recipe, were thinly-sliced plum tomatoes, mozzarella cheese, and Parmesan cheese.  These would be fine for most people.  However, as Sophia said, “You could leave off the tomatoes and put something else on the next batch.”  I agree.  The tomato slices didn’t enhance the bread at all…maybe it was because they weren’t as flavorful as the tomatoes the girls and I grew here during the summer.
Also baked or cooked on Sunday and included in the tray were:
Brownies – made from a mix-in-a-jar that Olivia and I had made last month.  Having all the ingredients pre-measured and in a jar make baking all that much easier when you need a quick dessert.  All I needed to add was three eggs and a bit of vanilla extract. 
Rice Krispie Bars – I make these dairy-free so Sophia can have them.  Used up most of the Rice Krispies making the recipe and a bag of marshmallows.  Cleaning out the cupboards in the process…always a plus.
Chex Mix – Used the recipe on the cereal box as a guideline, but didn’t have over half of the ingredients (e.g., garlic powder, onion powder, pretzels, dry-roasted peanuts).  Substituted what I had on hand and used up all the Chex cereals, Spanish peanuts, and bagel chips. 
Pizza Dipping Sauce – This is the Papa John’s Pizza Sauce recipe that I’ve modified a bit.  The girls enjoyed using the dipping sauce with the foccacia.  I’ve also made homemade breadsticks which taste very good with the dipping sauce as well.
Chicken Salad – Using up leftover chicken from a dinner a couple nights ago.  Added fresh red pepper, celery, and chopped almonds to it. 
Banana Bread – Used seven overly-ripe bananas (the best kind!) to make the bread.  The recipe is from my grandma (my dad’s mom).  Made the bread as muffins rather than in loaf form. 
Deviled Eggs – Made several deviled eggs not following any recipe (served others on a plate since I didn’t want to put one egg in each spot in the muffin tin). This used up the remaining eggs in one carton.
When I was growing up, my mom used to do dinners of leftovers on some Saturday or Sunday nights.  Often, the items were just reheated in the oven and served in a variety of pans.  It was a simple way for her to serve dinner and ensured there was very little food waste.
This week, I wanted to do the theme of “Favorite Foods” with the goal of using what I had on hand.  It’s nice to have a bit more room now in the cupboards and refrigerator now. 
The Muffin Tin Monday website has a lot of great ideas and links of other families who use the Muffin Tin Monday concept…and not just on Mondays.  (However, I may have to do another version of this meal tonight since Olivia is looking forward to having a Muffin Tin Meal on Monday.)
Muffin Tin Monday at Her Cup Overfloweth

Read Full Post »

Older Posts »