Feeds:
Posts
Comments

Archive for the ‘summer’ Category

Since June, Mama to 4 Blessings along with Harvest Moon By Hand, Adventures of Mommydom, Sweet Diva, and Sweet Phenomena have hosted weekly Fun in the Summer Fun link up events.
With homeschooling planning being finalized or already begun, the hosts are wrapping up the Fun in the Summer Sun event this week.
*~*~*~*~*~*~*~*~*
I’ve been working quite a bit on finishing the homeschool schedule for the 2011-2012 school year. Donna Young has some great forms for a DIY homeschool planner. I used the 6-column/9-row format. For each week, I need two of these forms in order to accomodate the school subjects and activities the girls are doing.
Here’s what a sample week looks like (the second page is under the first one, but the subjects are showing for each page):
A page from my 2011-2012 homeschool planner.
(The form is from Donna Young’s website.)
The subjects include:
– math,
– reading (Newberry and Caldecott books),
– writing (e.g., fiction, non-fiction, creative, poetry),
– spelling,
– U.S. geography (multi-disciplinary unit study),
– nature study,
– science,
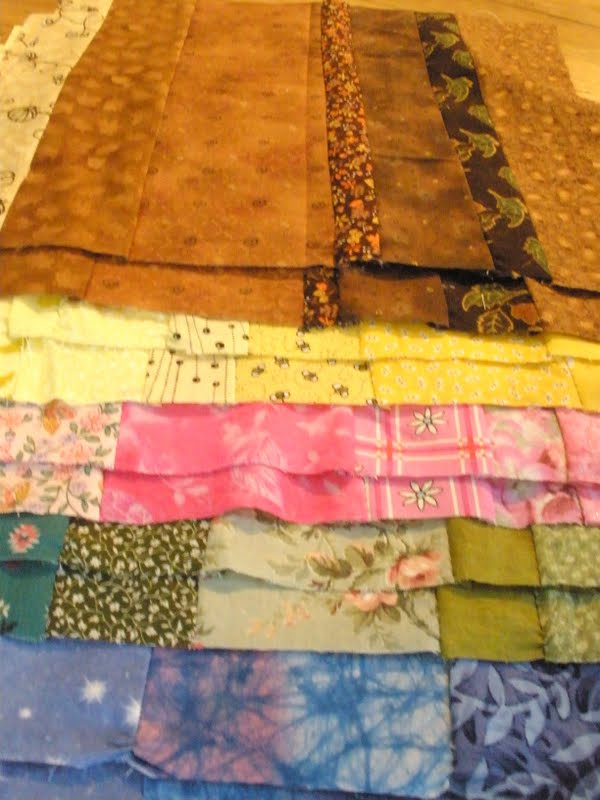
– home economics (sewing, cooking, and handiwork),
– character education,
– penmanship (printing, handwriting, and Spencerian),
– 5 in a Row (literature-based unit study),
– art,
– music (piano, harp, music fundamentals, and bookwork),
– American Sign Language,
– holidays (using the Happy Birthday, Grandma Moses book for ideas),
– computers (apps on iPad for multi-sensory learning to help Olivia with reading and spelling due to multiple learning disabilities; and for Sophia to help augment her core subjects)
– typing/keyboard/word processing/Office software programs
– history (American – from Civil War to the present day)
– physical education
– special education and speech therapy
– Brownies and Girl Scouts (doing the Juliette program)
– 4-H
*~*~*~*~*~*~*~*~*
So, with planning almost done (a huge relief!) and summer wrapping up, this marks the end of what has been a great partnership between five mothers who blog. It’s been a delight and privilege to be a part of the Fun in the Summer Sun series.
To stay in touch, we’re doing a link up this week instead of a regular topic. So, simply link up your blog, Twitter, Facebook, RSS Feed, or any other social media to which you belong. Please do not link up giveaways (they will be deleted).
Hope you had a great summer! Thank you for participating!

Read Full Post »

Welcome to the Fun in the Summer Sun event!

Each Monday until September 7th
Mama to 4 Blessings along with Harvest Moon By Hand,
Adventures of Mommydom, Sweet Diva, and Sweet Phenomena
will be hosting Fun in the Summer Fun link up events.

Here’s the line up:

1st Monday of each month: link up your “Kid-friendly summer activities”
2nd Monday of each month: link up your “Kid-friendly summer crafts”
3rd Monday of each month: link up your “Kid-friendly summer recipes”
4th Monday of each month: link up your “How to stay cool in the summer heat”

*~*~*~*~*~*~*

Family Fun Backyard Fun Badge

In the July 2011 issue of Family Fun, the Backyard Fun Badge was presented. For ten months, there will be a monthly challenge for families to do. There are three options from which to choose.  By doing the activity, you earn a badge (either use the one in the magazine or download from the computer).

Then go online and tell them what you did and enter their sweepstakes for a chance to win prizes. 

One of the ideas that caught my eye for July was option #2 – Host a Campout.  Although they suggested sleeping out under the stars, we don’t have a tent so we opt to spread out a blanket and pillows and enjoy spending part of the day outside.

Fire by Lake Superior
A campfire I made on the
shore of Lake Superior.

One of the recipes I remember trying when I was in Girl Scouts and one that is easy to use with children is called Dough Boys. To make them, here’s a basic recipe:

Ingredients:

hot dog
biscuit mix
water

Directions:

Make biscuit dough mix according to the directions on the box or a recipe. Take a hot dog and wrap the biscuit dough around the hot dog (completely or just a center wrap).

Be careful not to put too much dough on or your hot dog will not cook. Toast your “dough boy” over hot coals until it is cooked through and golden brown on the outside. Serve with catsup or mustard.

When I directed a camp program for children, one of the meals that we taught the children to make was All in One Wrapped in Foil Dinner.

Ingredients:

ground beef
oil
sliced raw potatoes, carrots, and onion
seasoned salt
catsup
foil

Directions:

Fold aluminum so that there is a double layer. Put ground beef (about the size of a small hamburger) on foil, in the center. Drizzle a small about of oil on it (about 1/2 tsp).

Place carrots and potatoes (to your liking) and then onions. Fold over foil edges to make a flat packet. Be careful to fold over any edge so the package doesn’t leak. Use tongs and place right on the coals.

When you hear it “sizzle,” flip it. Flip it often and cook for 7-10 minutes. Open carefully (the foil will be hot!) and poke a potato with a fork. When it pierces it easily, supper is ready. Serve with seasoned salt and catsup.

The Girls and I  at William O'Brien Camping
Olivia, Sophia, and I at William O’Brien State Park
camping one year. It was so much fun!

A couple of years ago, Sophia, Olivia, and I went camping with my sister and her two sons. One of the things we made were Brown Bears.  All of us liked this easy dessert.

Ingredients:

refrigerator biscuits
spray margarine
cinnamon and sugar
wooden dowel for roasting stick

Directions:

Stretch biscuit dough and wrap around a wooden dowel and roast over coals until brown. Remove biscuit from dowel, spray with margarine and roll in cinnamon and sugar mixture. Fun to make and tasty too.

The Girls Making Cinnamon Rolls Over the Campfire
Olivia and Sophia trying 
Brown Bears for dessert.

For another dessert, there’s a special treat that reminds me of when I was growing up and took a kids cooking class. It’s a chocolate-banana melt dessert that was featured in the June/July 2011 issue of Family Fun

To make the dessert, cut a lengthwise slit in a peeled banana and place it on a sheet of alumninum foil. Stuff in as many chocolate chips and mini marshmallows as you can fit.

Wrap the foil around the banana and place it on a grill for about five minutes. The melt, once cooled, is best eaten with a spoon (and lots of napkins).

*~*~*~*~*~*~*~*

For the August Badges of Fun, the theme was “Hit the Road.”  Out of the three activities, we chose to do “Pack Easy-to-Eat Snacks.”

One of the recipes on the Family Fun website is for homemade granola bars.

Ingredients:

1/2 cup butter or margarine
1/3 cup sugar
1/3 cup honey
1/4 cup flour
1/2 teaspoon vanilla extract
1/4 teaspoon cinnamon
2 cups crisp rice cereal
2 cups rolled oats
1 cup dried fruit bits
1/2 cup sliced almonds

Directions:

Heat the oven to 350º F. Coat a 9- by 13-inch pan with nonstick cooking spray and set aside.

Melt the butter or margarine in a large pot over low heat. Remove the pot from the heat and whisk in the sugar, honey, flour, vanilla extract, and cinnamon. Add the remaining ingredients and mix well.

Transfer the mixture to the baking pan. Using a sheet or waxed paper and the palms of your hands, press the granola firmly into the pan, packing it to a flat and even thickness.

Bake for 20 minutes, until golden brown. Allow the granola to cool 1 hour in the pan, then transfer to a wire rack to cool completely before cutting into bars. Makes 16 to 24 rectangular bars.

*~*~*~*~*~*~*~*

Now it’s your turn to share some of your kid-friendly summer activities!

Read Full Post »

Welcome to the Fun in the Summer Sun event!

Each Monday until September 7th
Mama to 4 Blessings along with Harvest Moon By Hand,
Adventures of Mommydom, Sweet Diva, and Sweet Phenomena
will be hosting Fun in the Summer Fun link up events.

Here’s the line up:

1st Monday of each month: link up your “Kid-friendly summer activities”
2nd Monday of each month: link up your “Kid-friendly summer crafts”
3rd Monday of each month: link up your “Kid-friendly summer recipes”
4th Monday of each month: link up your “How to stay cool in the summer heat”

*~*~*~*~*~*~*

With the temperatures rising this past week to a rather tropical level (dewpoints were in the upper 70s and low 80s and temperatures in the 90s making some days feel like it was 110-116 degrees), it’s a perfect week to look at ideas for cooling down. 

Make a Pinaqua

This idea is from the Family Fun June/July 2011 issue. This is a candy-free version of a pinata that is filled with water. To make it, fill a medium plastic trash bag with 1-2 gallons of water and knot the top.

Tie a rope or piece of twine beneat the knot. Toss the tree end of the rope over a tree branch and either tie it securly or have an adult stand by to raise and lower the pinaqua.

Pinaqua.

After being blindfolded and spun around three times, each player takes three whacks at the pinaqua with a broom. The winner is the one who manages to break the bag and unleash the wave.

Go Swimming

The girls enjoyed going swimming with a family friend on Wednesday. She took them to their favorite beach where they swam and played in the water for about an hour and a half. Afterwards, they enjoyed a little snack on the beach before coming back home.

Square Lake Beach.

Stay Indoors

On the hottest days when it literally felt like an oven outside, we chose to stay cool by staying indoors. The girls read and/or listened to books on CD, embroidered, played board games, practiced the piano and harp, did puzzles, and sewed doll clothes.

We also homeschool around the year (with a slightly more relaxed scheduled during the summer months), so they also worked on math, history, science/nature study, and government this week.

*~*~*~*~*~*~*~*~*~*

Now it’s your turn! What are some ways that your family stays cool during the summer?

Read Full Post »

Here it is Week 7 of The Summer of Color challenge. This week’s color is one of my favorite ones: purple (another favorite color of mine is green). 

When I was growing up, my bedroom was all purple – the walls, the carpet, and even the decorative stenciling at the top of the walls near the ceiling. Anything I made for the room – a quilt, a picture, a pillow – had something purple in it. 

Needless to say, I was excited to work with purple this week, and made some window stars.  Two of the stars are created from patterns that I have used regularly.

The sun was so bright in the afternoon
which revealed the patterns in each of the window stars.

The third pattern (the star on the bottom in the picture above) is one that I designed a couple weeks ago. I’ve been playing around with the pattern in different colors (solo and color combinations).

This is the newest pattern that I created.

A bit about the window stars: the translucent paper is cut into small pieces for each of the points. I hand-fold each of the points multiple times and then glue the points together. Once all of the points are attached, the pattern of the star is revealed.

Some of the stars are easy. For example, the star on the upper right has only five folds per point (with ten points, that’s 50 folds to make the star).

It took 50 folds to make this star.

Other stars are a bit more complicated. The star on the upper left in the picture above has 10 folds per point. It has 8 points, so that’s 80 folds to make the star.

The most complicated star I make has 26 folds per point and 8 points. That’s 208 folds to make one window star. 

The other project I’ve been working on for The Summer of Color challenge is a quilt. As I’ve mentioned before, each week I make two quilt squares that feature the color of the week. Each square has seven strips of fabric of varying widths to represent a 7-day week.

Two quilt squares done in 7 different patterns and shades of purple.
Two of the fabrics have “glittery” and “sparkly” elements –
the bonus challenge of the week.

All the fabric I’m using is from what I have on hand. I am committed to not purchasing any new supplies or materials to make the quilt.  I think of all the quilts that my grandma and mom made using fabric that was available. They made do with what they had rather than always purchasing new supplies.

Thought this would be a good time to challenge myself to make do with what I have rather than acquiring new fabric (however much I would enjoy going to a fabric store and picking beautiful material that is all color- and pattern-coordinated).

14 squares done…2 more to go!
Eenie (the cat) watched me lay out the squares.
I know he wanted to jump on them and mess them up.
He was a good cat…he showed some restraint….at least this time.

Read Full Post »

This month the Unique Women in Business team is doing a Blog Hop focused on Summer Fun.  With temperatures in the 90s (some close to 100 degrees) and dew points in the 70s it feels like it’s quite tropical here in Minnesota.

For me, having fun during the summer means having some flexibility to do things I enjoy doing since the homeschooling schedule is a bit more relaxed compared to the September-May time period. 

During June and July, I’ve been able to make new window star patterns. Here’s a design that I created recently:

Window star in summer colors.
Window stars are available in my shop, Harvest Moon by Hand.

The window star that is pictured above reminds me of sunsets and sunrises in colors I typically see in the summer. There have been some spectacular ones that have colored the entire sky in shades of these colors.  I am always in awe of the incredible natural beauty that surrounds me.

*~*~*~*~*~*~*~*~*~*

Today, I was teaching a friend of my daughters how to sew since she wants to learn how to make her own clothes. The first project I had her do was a little bag with an attached tie.

There were no measurements for this pattern – it was simply an idea presented in a book.  So I showed her how to estimate and create the dimensions for each of the pieces.  By the time she was done sewing her first bag, she had learned some fundamental sewing skills…and felt very happy with what she made.

After seeing the bag (and trying out the pattern I’ve wanted to do for some time now), I made a couple of bags after she left and changed the proportions slightly. 

Two bags that I made.
The bags are a great way to use fabric and ribbon scraps. I’ve made re-usable gift bags using only one color of fabric for birthdays and Christmas.
As I made these bags, I thought they would be good to use for the girls in their backpacks or when traveling. By making the bags in a variety of different sizes and patterns, one’s suitcase, purse, or backpack could be much more organized.
*~*~*~*~*~*~*~*~*~*
Last, having fun during the summer means being able to enjoy nature up close. Today I enjoyed watching a bird take a bath in the birdbath in the backyard. For several minutes, it cleaned its feathers…tossing the water in the air and under its wings.
That, in itself, would have made me happy today. But…I woke up this morning and found that two of the butterflies we’ve been raising since they were caterpillars had emerged from their cocoons.
Around 11:25 a.m., the third butterfly was born and we were able to watch its wings unfold, dry, and be strong enough to fly. What an amazing process!
The girls (and Eenie) watching two of the
newly-born butterflies.

After lunch, we released the butterflies in the backyard. The black tiger swallowtails flew off immediately. One flew right to the purple flowers in the butterfly garden in the backyard where it visited lots of flowers while its wings beat quickly.

The butterfly was flapping its top wings so quickly
(thus, the picture is blurry on the top).
It was such a joy to be able to watch them
change from caterpillars to butterflies during July.

Read Full Post »

Welcome to the Fun in the Summer Sun event!

Each Monday until September 7th
Mama to 4 Blessings along with Harvest Moon By Hand,
Adventures of Mommydom, Sweet Diva, and Sweet Phenomena
will be hosting Fun in the Summer Fun link up events.

Here’s the line up:

1st Monday of each month: link up your “Kid-friendly summer activities”
2nd Monday of each month: link up your “Kid-friendly summer crafts”
3rd Monday of each month: link up your “Kid-friendly summer recipes”
4th Monday of each month: link up your “How to stay cool in the summer heat”

*~*~*~*~*~*~*
This week – with temperatures in the upper 90s and dewpoints in the 70s (like the tropics) – Sophia and Olivia will need some refreshing drinks and cold treats. 
One of the favorite drinks we recently made is Rhubarb Slush.  “Rhubarb…for kids?” you may be thinking. Surprisingly, the rhubarb is not the first flavor that you taste – it’s actually the strawberries.
Rhubarb Slush
This recipe isn’t, perhaps, the healthiest one since it contains sugar, gelatin, and ginger ale. However, it is refreshing and a special treat on incredibly hot days.
Rhubarb Slush
(Taste of Home magazine)
Ingredients:
8 cups diced fresh or frozen rhubarb
1 package (16 ounces) frozen unsweetened strawberries
3 cups sugar
8 cups water
1 package (3 ounces) strawberry gelatin
1/2 cup lemon juice
11 cups ginger ale, chilled
Directions:
In a Dutch oven or heavy pot, bring the rhubarb, strawberries, sugar, and water to a boil. Reduce heat; simmer, uncovered, for 5-8 minutes or until rhubarb is tender. Press through a sieve; discard pulp. Stir in gelatin and elmon juice until dissolved.
Transfer to a freezer container and freeze, stirring occasionally, until firm. May be frozen up to 3 months.
To use frozen rhubarb mixture: In a punch bowl or several pitchers, combine equal amount of rhubarb mixture and ginger ale. Or, for one serving, combine 1/2 cup rhubarb mixture and 1/2 cup ginger ale in a glass. Serve immediately.
Note:
I froze the mixture in a 9″x13″ pan. Once it was frozen, I took it out of the freezer and let it thaw just a bit so it could be easily cut into small pieces (each the equivalent of 1/2 cup). I placed all of the cubes of the frozen mixture on a cookie sheet and re-froze them.
Once frozen, I placed them in a gallon freezer storage bag. In that way, when the girls are thirsty or someone visits, a refreshing drink easily can be made.
*~*~*~*~*~*~*~*~*
The next recipe is “Can’t Be Beat Banana Ice Cream Pops” from the book Sneaky Fitness: Fun, Foolproof Ways to Slip Fitness Into Your Child’s Everyday Life.
The book says that each banana pop has a serving of fruit and calcium. They’re a low-fat, low-calorie treat; and even appropriate for on-the-go-breakfasts.
The recipe calls for milk, yogurt, and chocolate chips. Since Sophia has a dairy allergy, I modified the recipe so that all dairy-free ingredients are used.
Can’t Be Beat Banana Ice Cream Pops
(Sneaky Fitness)
Ingredients:
1/2 cup low-fat milk
1/2 cup vanilla (or banana) yogurt
2 large bananas
2 tablespoons sugar
1/4 cup semi-sweet chocolate chips (ideally “mini”, optional)
Directions:
Blend all ingredients except chocolate chips in a blender until smooth. Pour equal amounts in popsicle molds, then drop about one tablespoon of chocolate chips into each pop, if desired (we used 1/2 tablespoon per pop). Insert stick, and freeze for at least three hours.
Olivia placing the dairy-free chocolate chips
in each banana ice cream pop.
*~*~*~*~*~*~*~*~*
The final recipe is for Orange Creamsicle Smoothies that we made into popsicles.  The smoothies and popsicles are not overly sweet.
I was envisioning the sugary creamsicles that are sold in the freezer section at the grocery store which I fondly remember from childhood. The smoothies/popsicles do not taste like that. This recipe is a healthier versions.
Orange Creamsicle Smoothie
Ingredients:
1 1/2 cups vanilla yogurt (we used dairy-free yogurt)
1/4 cup orange juice concentrate
1 banana
1/8 teaspoon cinnamon
Directions:
Blend ingredients until smooth and serve with a wedge of orange. You can also make the smoothies into popsicles by filling small cups and adding sticks or using popsicle holders. (I normally use these, but all the trays and holders are being used now.)
Orange Creamsicle Smoothie
Now it’s your turn!  What recipes do your children enjoy making and/or eating?

Read Full Post »

I can’t believe this is already Week 6 of The Summer of Color challenge. This week’s color is red; and I did a couple of things with this color.

First, I made two red window stars. They are made from translucent paper that lets the light shine through so the pattern of the star is revealed. 

Two red origami window stars.

The 8-pointed star with the sharp points is folded 9 times per point. With eight points, it is folded 72 times before it is glued together.

The other star I made is folded 19 times per point. With 8 points, it is folded 152 times before being glued together.

*~*~*~*~*~*~*~*~*~*~*~*

I also made two quilt squares this week. There are twelve squares now…the quilt is coming along.

Two red quilt squares. Seven different fabrics are used for each square
to represent seven days in the week.

As I mentioned last week, I’m using only fabric that I have on hand for the quilt. I’m not purchasing anything new. It’s definitely one of the most resouceful, “make do” quilts I’ve made. Only four more weeks left – or eight quilt squares – before I’m able to start arranging them and laying out the quilt top. 

*~*~*~*~*~*~*~*~*~*~*~*

Although the red isn’t as vivid on this little bird as it is on adult robins, it fits the challenge of incorporating something winged into your work (in this case, a quick photo).

I was walking to the garden on Friday afternoon, and a ball of feathers moved on the ground.  A baby robin had fallen from its nest.

Baby robin on the ground.

It was quiet for a while, but very curious and eager to be fed.

When I moved the camera a bit closer,
it opened its mouth slowly to be fed.
After a call to the wildlife rehabilitation center, they said that it would be fine to pick up the bird and put it back in the nest if it had not already flown back up to the nest. Birds have a very weak sense of smell, so there’s not a problem with the mother rejecting the baby.
By the time I went back outside, the baby bird had flown back into the nest. I felt so lucky to have been able to see the young bird at this stage of its life. Normally, the robin nests are so high and well-protected that the young ones are not visible until they are fully-grown.

Read Full Post »

Welcome to the Fun in the Summer Sun event!

Each Monday until September 7th
Mama to 4 Blessings along with Harvest Moon By Hand,
Adventures of Mommydom, Sweet Diva, and Sweet Phenomena
will be hosting Fun in the Summer Fun link up events.

Here’s the line up:

1st Monday of each month: link up your “Kid-friendly summer activities”
2nd Monday of each month: link up your “Kid-friendly summer crafts”
3rd Monday of each month: link up your “Kid-friendly summer recipes”
4th Monday of each month: link up your “How to stay cool in the summer heat”

*~*~*~*~*~*~*

This week Sophia and Olivia did two different crafts that they enjoyed: embroidery and beading.

Sophia embroidered a pillowcase with a horse and foal design. The supplies were all ones that we had on hand: a pillowcase, embroidery floss, and an iron-on pattern. I never have used iron-on patterns, though they were something that I wanted to try after seeing the selection at Joann’s.

Sophia’s embroidered pillowcase.

Sophia worked during the week on the design and was very happy with how it turned out. She’s 10 years old, and has being doing embroidery now for several years.

Sophia used the backstitch
to do her embroidered pillowcase.

*~*~*~*~*~*~*~*

Olivia enjoys doing arts and crafts – anything that lets her creatively express herself. She picked out a loom that can be used for both beading and cotton-floss weaving.

Olivia working on her beaded bracelet.

She chose to make a bracelet with red, white, and blue beads. I set up the loom for her; and then Olivia beaded the bracelet. She followed a graph-paper chart that I did based on a picture of a bracelet pattern she liked that came with the loom.

Olivia used a sewing needle to secure the beads
in place on the bracelet.

It took a lot of concentration and patience, but she completed the bracelet within a half a day. She’s happy with it, and wants to do more beading…but not right away. “My hand needs a break. It’s tired,” she said.

Olivia wearing the bracelet she made.
Now it’s your turn! What are some fun ideas for crafting with kids?

Read Full Post »

I’ve been enjoying the past four weeks of The Summer of Color challenge. Week 5 is no different.  This week’s color is brown, and I made three origami window stars as well as completed two more squares for my Summer of Color quilt.

Window stars that I made with brown translucent paper.
Each of the star points is folded multiple times and glued. Then, the points are attached to one another to reveal the window star’s pattern.
I’ve made this pattern before, but never in brown.
It’s interesting how different color paper
can completely change the look and feel of the window stars.

The sun was particularly bright on Sunday afternoon. With a 68% humidity level and temperature in the upper 80s, it felt quite tropical outside. And, to think, about two months ago there was snow on the ground. With the sun so bright, it almost makes the window star points glow.

This would be a good window star to
put up around autumn or Thanksgiving.
The quilt is coming along. I have ten 12-inch squares done which is good.
Ten quilt squares are done.
My goal is to use only fabric that I have on hand rather than buying new fabric.
For each of the quilt squares, there are seven different fabrics used.
Seven represents the number of days in the week.
I’d like to use the fabric that I’ve had for some time now and put it to good use.
This is not the order the squares will be in for the quilt.
I’m going to have a plain-colored piece of fabric in between each
row and column to break up the squares.
(Yes, that’s a dog nose in the upper right hand corner of the picture.
Montague is resting near the quilt squares.)

Read Full Post »

During the summer, we’re participating in the Smart Summer Challenge and the second week focuses on government.  Doing a week-long government study has been a wonderful preview of what we will be doing in a couple of months when we begin our multi-year, multi-disciplinary study of each of the states in the U.S.A. 

On Thursday and Friday, we talked about coins, coin collecting, and some of the presidents represented on the coins. One of the presidents featured is Thomas Jefferson.

One of the things we learned is that several of kids’ favorite foods were introduced by Jefferson. Some historians believe that Jefferson introduced french fries and macaroni and cheese to the American colonies. It is written that Jefferson had “potatoes served in the French manner” served at a White House dinner in 1802.

Thomas Jefferson first served macaroni and cheese at the President’s House also in 1802. A recipe for macaroni and cheese is included in Mary Randolph’s popular 1824 cookbook, The Virginia Housewife.

Of course, the dish that Jefferson ate is nothing like the boxed version so common today. Rather, Jefferson’s cooks used pasta and parmesan cheese imported from Italy. They cooked the macaroni until it was soft, and then coated it with butter and added cheese. The mixture was then placed in a casserole dish, dotted with more butter and cheese, and baked until it was slightly brown with some crustiness on top.

I made a version like this last week for a friend and her children who were visiting. The kids – who have had the boxed macaroni and cheese over the baked version more often – weren’t huge fans of this “old fashioned” type of macaroni and cheese. Oh well.

In addition to french fries and macaroni and cheese, Jefferson helped encourage people to eat tomatoes. Many people in the colonies thought tomatoes were poisonous, so they wouldn’t eat them. Jefferson proved that tomatoes were not poisonous, so they became popular.

To remember this, we had pizza for dinner (which had a tomato-base sauce). 

The girls having pizza while learning about Thomas Jefferson.

Historians are certain that Jefferson wrote the very first recipe for ice cream in the American colonies. In celebration of this, we tried a new recipe for Cookies & Cream Floats.

To make them, you put a couple of scoops of Cookies & Cream ice cream into a cup. Slowly add some cream soda until it’s at a consistency that you prefer (e.g., thicker malts need less soda; thinner malts need more soda).

Cookies and Cream
By learning about Thomas Jefferson, I came across an interesting blog called The History Chef! written by Suzy Evans. She has a Ph.D. in history from UC Berkeley, is a mother to four children, and writes the blog as she is writing a book about the presidents’ favorite foods. Her goal is to help parents and children learn how to cook together while learning about history; and hopefully help them create many great memories and meals together.
I know this will be a blog that I will be using during the upcoming study about the United States. As we study about each state, we will see if any presidents were born in the one we are studying. If so, we will visit The History Chef! and try a recipe to tie into the presidential-state connection.

Read Full Post »

Older Posts »