I’ve been spending some time over the past few days making some new hand-embroidered toys. I used all natural materials to create the toys: wool felt, sheep wool stuffing, cotton embroidery floss, and cotton stockinette fabric.
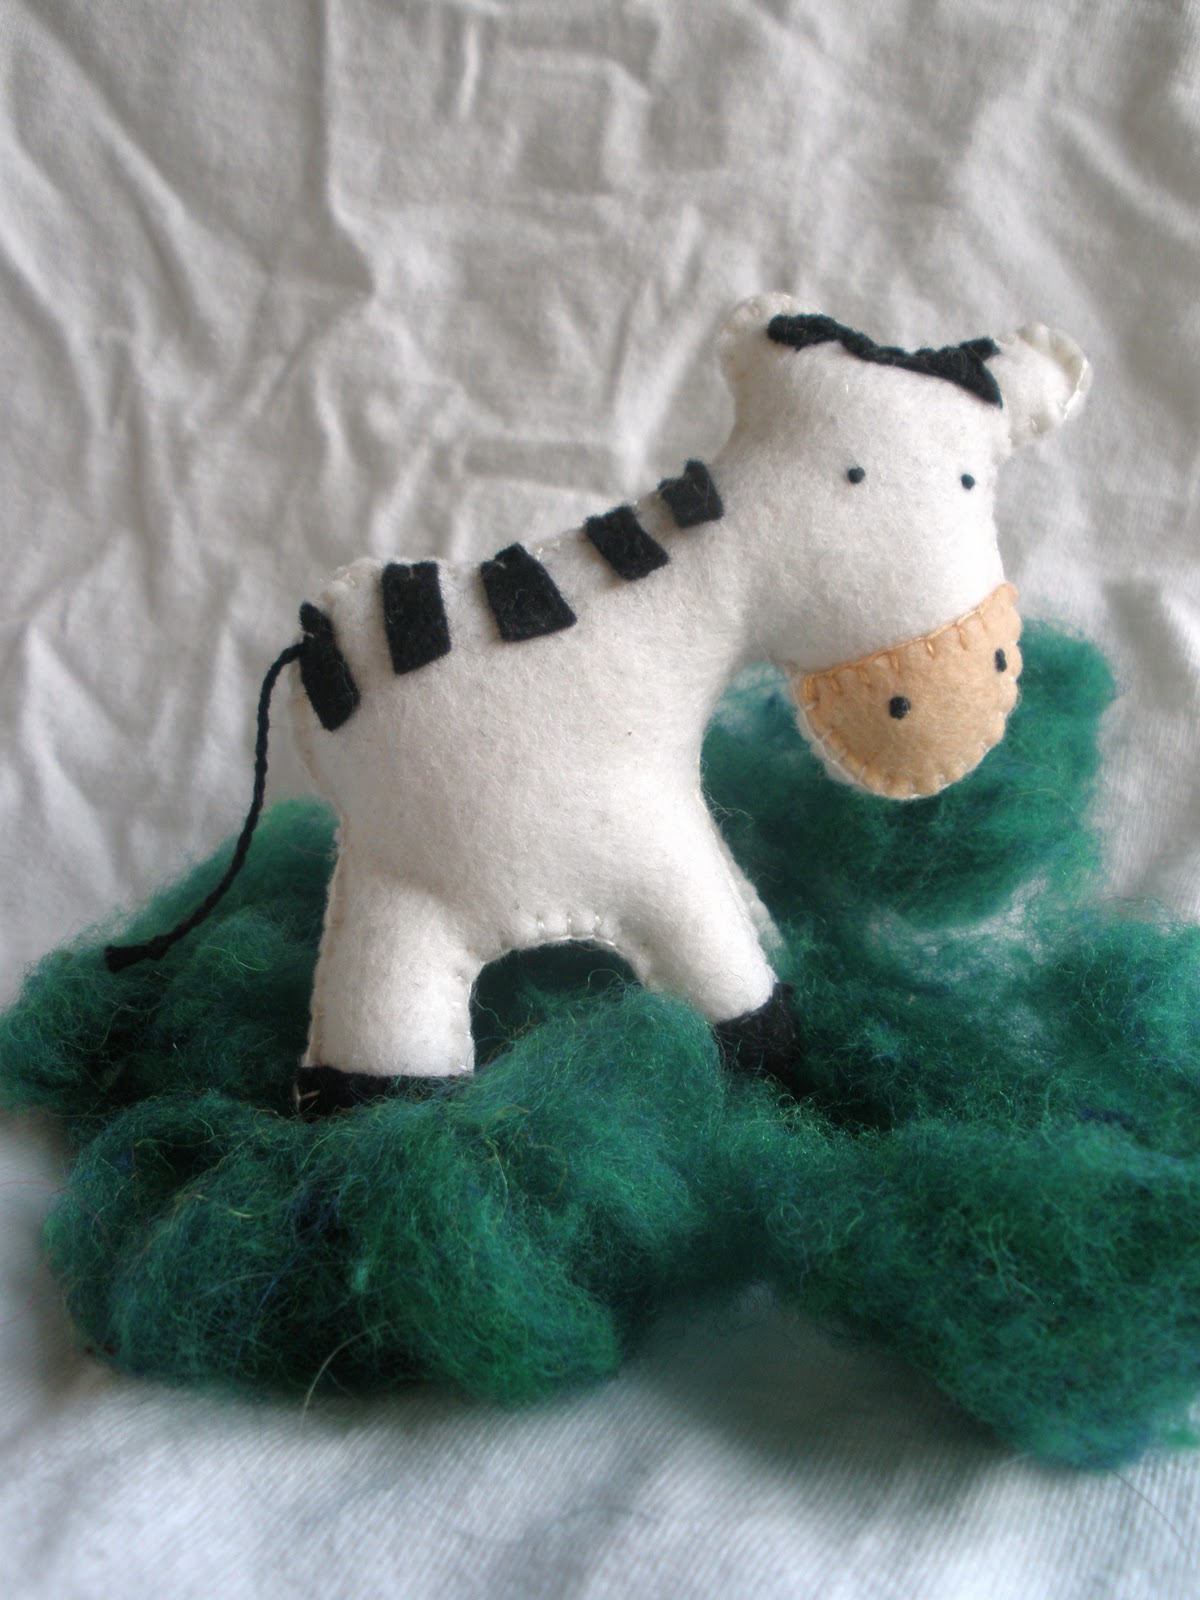
Archive for the ‘pattern’ Category
Hand-Embroidered Wool Felt Toys
Posted in art doll, books, dolls, embroidery, etsy, for sale, pattern, play, sewing, toys on February 20, 2011| 6 Comments »
Countdown to Christmas – Day 13 (Make Felt Ornaments)
Posted in Christmas, embroidery, pattern, sewing on December 13, 2010| 1 Comment »
Today’s activity as we move toward Christmas, is making ornaments. I cut pieces from wool felt for five ornaments.
The top two are blue and purple ornaments with a white decorative top (there’s an image of two birds, 2 hearts, and circles). The pattern came from “Living Crafts” magazine. There’s a pattern for a rather large version of the ornament (a five-sided star that could be used as a tree-topper). However, I didn’t have a piece of wool felt that large, so I chose to do smaller ornaments instead.
The green ornament will be a tree. The red and white ornaments are going to be miniature clothes (a dress and shirt) that will be hung on little hangers on the tree.
The girls will each pick one (or more) of the ornaments to make. I’ll make the rest of the ornaments.
Since they had classes and piano lessons at the homeschool co-op today, this project will continue tomorrow.
Wool Felt Hat Pincushion
Posted in colorful, embroidery, pattern, quilt making, sewing on August 1, 2010| 3 Comments »
I’ve been wanting to make this pincushion for a long time now. I’ve needed something to put my pins in as I take them out when I’m quilting or sewing.
The pincushion is made from 100% wool felt. It is hand-embroidered using cotton floss.
The pattern is from Better Homes & Gardens (on its website).
Olivia Making a Circular Quilt
Posted in art, art education, homeschooling, learning, montessori, new skills, pattern, quilt making, sewing, textile art, unschooling, waldorf on June 10, 2010| Leave a Comment »
Made the ironing board much shorter so that Olivia could iron the quilt she’s working on for the county fair.
Had Olivia look on Flickr for ideas about what she wanted her quilt to look like. She saw on that was circular that had a rainbow of colors on a white background.
Her idea was to take a lot of fabric that had blue in it (her favorite color) and make the circle. The inside of the circle and background will be white.
Not sure yet how she’s going to quilt the top. She’ll need to figure that out next week.
I helped her by showing her how to make a circle, dividing it into parts (she drew the lines), and making a pattern piece (adding 1/4 inch on each long side for the seam allowance).
She cut the pieces out and sewed them together (I need to operate the pedal since her feet don’t reach the floor).
Since we were creating our own pattern, she did need to add a couple of extra pieces to the circle. However, by doing this and modifying some of the seam allowances, the circle quilt now lays flat.
In this case, the quilt is more about the PROCESS of sewing rather than the PRODUCT. She’s learning how to create a pattern, machine sew unusual shapes together, modify a project so that it can be taken to the next stage, hand-sew and try to hide the stitching, and how to iron.
Pillowcase Dress
Posted in community service, donation, education, homeschooling, learning, new skills, pattern, recycle, reuse, sewing, simplicity, unschooling on April 10, 2010| 4 Comments »
This is the pillowcase dress that I made for Little Dresses for Africa.
I used a pillowcase, bias tape, and a floral fabric to create the dress. It is about a size 7 with adjustable ties at the shoulder. The instructions that I used for making the pillowcase dress are HERE. Little Dresses for Africa also has a tutorial with pictures HERE.
This was made to donate to Little Dresses for Africa which in turn distributes them to girls who are orphans in Africa. Many of them have lost their parents to AIDS and are on their own. They have one outfit…maybe two.
The pillowcase dress is an outfit that they receive to show them that someone cares about them.
I was inspired to make this dress because I had read about the project through a link on Twitter. There was a homeschool family who was making the dresses as one of their community service projects. After reading about Little Dresses for Africa as well as the need, I knew it was something that I wanted to do.
So, for about a month now, I’ve been working on the Little Dresses for Africa project. My goal for this project is threefold:
(1) to make a dress (or more) myself,
(2) to teach my daughters to each make a dress and donate them, and
(3) to teach a class at the homeschool co-op for upper-elementary, junior, and senior high students so they have an opportunity to make the dresses as well.
On Friday, April 9th, I made the dress. It ended up taking a bit longer than I anticipated, but I wanted to make the dress one that a little girl would enjoy wearing. The size of the dress is a 7. My 7 year old daughter wears a size 5, but could fit into it. I had her help me by trying on the dress and determining where to place the pockets.
So, as I was sewing on the bias tape, pockets, and trim at the bottom of the dress, I thought about a girl in Africa who would be receiving the dress. She would be about my daughter’s size…perhaps even around her age. I tried to imagine the difficulties already present in her young life…and how we often take for granted the simple things in our lives.
I took my time with making the dress because I want this little girl to know that someone does care and wants her to be comfortable and have something she can wear.
I added 2 pockets to the dress so the girl who receives it can put her hands in her pockets, collect natural things she finds on a walk, or carry a little toy or items around her home or village.
On the bottom of the dress, I added about a 2” trim of fabric that coordinates with the pockets.
I stitched and doubled stitched areas that I thought may receive more wear and tear. I want the dress to last for some time and not come apart since I’m not sure what sewing supplies the girl would have to mend her dress.
After I was done making the dress, I had my daughter try it on. She had a HUGE smile on her face, despite the fact that it was not her dress. I’m hoping that this is the same type of smile that the little girl who receives the dress I made will have on her face!
My youngest daughter said that she can’t wait to make a dress so it can go to another little girl. So, that’s the last part of my goal with this project: to help my daughters make dresses for Little Dresses for Africa.
In writing my thoughts, I go back to one thing that I read on another website about a group of women who made dresses for Little Dresses for Africa:
[In doing this project we are] “honoring a special group of moms… who can no longer hold their daughters or provide them clothes. Most died from AIDS or other illnesses and their children were left as orphans.
“We honor those precious moms by putting our hands to work and creating beautiful dresses for their little girls. We may not have changed the world, but for those little girls when they pull those dresses over their tiny heads – their worlds will change.”
I’m hoping that the dress I made as well as the ones I’ve guided other children and teens to make do make a difference.
Squirrel Papercuts
Posted in art, colorful, family traditions, holiday, legacy gifts, new skills, papercutting, pattern on February 7, 2010| Leave a Comment »
I made these Valentine’s Day theme papercuts for my daughters – the red one is for Olivia and the pink one is for Sophia.
There’s a free pattern (see below) that I printed onto white copy paper and cut it out. Then, I traced around the openings onto another sheet of white copy paper and cut it out using a sharp scissors.
Glued translucent paper onto the back (red on one heart and pink on the other) – the same kind that I use for my window stars. Tissue paper also could be used.
Here’s the link to the free pattern: PATTERN.