Feeds:
Posts
Comments

Archive for the ‘sewing’ Category

Here it is…the final week of The Summer of Color challenge that is being hosted by Kristen at Twinkle Like a Star. This has been such a wonderful project, and helped motivate me to:

– do some projects that I’ve wanted to do for a long time,
– create new window star patterns,
– try existing window star patterns in different colors, and
– make a quilt.

Projects I’ve Wanted to Do

I did several embroidery projects during the weeks when the featured color was pink and green.

Embroidered Greeting Cards
Pink hand-embroidered greeting cards.

Embroidered Dala Horse
Green hand-embroidered Dala horse and tree.
They can be used as ornaments or tags.
For the Blue Week, I did some sewing projects – a bunting and tablecloth.
Blue Bunting Close Up
Blue bunting.

Puzzle Tablecloth
Tablecloth that I made by tracing puzzle pieces
onto pieces of fabric. Each are hand-cut and then ironed onto
the white fabric using an iron-on adhesive.

Create New Window Star Patterns as well as Use Existing Patterns to Make Window Stars in New Colors

For many of the weeks, I enjoyed making window stars in a variety of colors. It was fun to create new patterns and see what the new window star would turn out like.

Trio of Purple Window Stars
Trio of purple window stars.
The pattern on the bottom is one I created.

Equally exciting for me was to see what window stars look like in different colors using patterns that I normally use.

Trio of Brown Window Stars
Trio of brown window stars.

Two orange window stars.
I’ve made these patterns before, but never in orange.
The pattern on the left is one I’ve used before, and
the pattern on the right is a new one I created.

Two yellow window stars. The pattern on the left is one I created
and the one on the right is one I’ve made in different colors
but never in yellow until The Summer of Color challenge.

Creating a Quilt

My on-going project during the summer was a quilt. Each week, after the color was assigned, I created two quilt blocks that were about 11 1/2″ square. Each square included seven different patterns of fabric – to represent the seven days of the week.

My goal was to use only fabric, thread, and batting that I had on hand.  This wasn’t a challenge when I was doing the squares – it seemed like I had plenty of fabric to choose from.

WIP - The Summer of Color Quilt
Five weeks’ worth of quilt squares.

However, once I got to the backing and batting, it became a bit more difficult. I didn’t have either the fabric or batting in the size I needed for the quilt. So, I had to piece both elements together to create the quilt.

The batting needed to be hand-sewn in order to attach each piece to one another (there were three pieces of batting used). For the quilt back, I used one of Sophia’s floral-print sheets and cut about a six-inch section off the end.

By cutting that in length-wise and sewing the pieces together, I was able to create enough fabric to sew to the other piece…thereby creating a quilt backing.

Quilt squares bordered by 3″ white fabric strips.
The white fabric strips are from
bed linens that were discarded from a hotel.
I washed the sheets and was able
to use the fabric to make the quilt.

What I like about the quilt is that it is made entirely from fabric, thread, and batting that I had on hand. I didn’t have to purchase anything to make it!

The Summer of Color quilt that I made
during June-August 2011.
Lots of color will be welcome during the middle of winter
when the landscape is all white and
the temperature is well below zero.
Sophia, Olivia, and I will use this
soft, colorful quilt when
we homeschool and read together.

Read Full Post »

On 5 Kids and a Dog, there’s a series called the ABCs of Homeschooling.  This week’s letter is “Q.” 

Alphabet ATC or ACEO Available - Needlefelted Letter Q…is for Quilting.

For over four years, Sophia and Olivia have been learning how to quilt. They started hand-sewing a bit before machine-sewing to get comfortable with a thread, needle, and fabric.

One of the first projects that the girls did was a simple patchwork quilt. They picked fabric from what I had on hand (a lesson in itself of resourcefulness and making do).

For some of their first sewing projects, they traced squares onto the back/wrong side of the fabric and then cut them out. They moved onto measuring and marking lines on the fabric. Sophia now can use a rotary cutter to cut fabric.

Assembling the Quilt
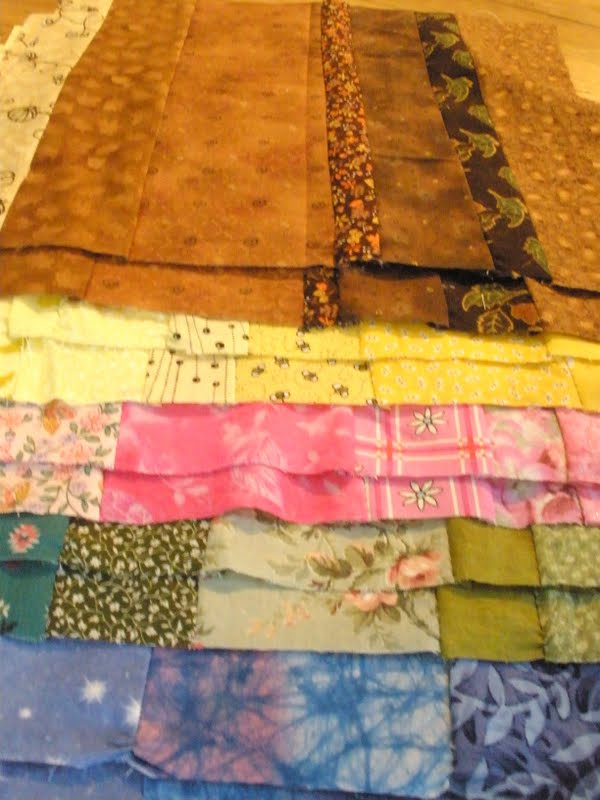
Olivia arranging squares for her first patchwork quilt.
She’s about 4 years old here (2007).

One of Olivia’s favorite quilts that she made was one using fabric she found at a quilting store in Pella, Iowa. The girls, my parents, and I traveled to Pella in the spring to see the tulips. There was a wonderful quilting store right off the main square.

Olivia liked a printed fabric with dogs on it. From that pattern, she picked several other fabrics to coordinate with it. She cut, arranged, and sewed all the pieces together to create her quilt.

Olivia with the Quilt She Made
Olivia made this quilt using fabric she found at a quilt shop on a trip.
This quilt holds special meaning and memories for her.
She was 6 years old when she made this quilt (2009).

Olivia entered her quilt in the county fair in the youth open class division. She was competing with children up to the age of 16 years old in her category.

She won first prize… a blue ribbon (there are only 6 ribbons – 1st through 6th place – awarded in a category). Needless to say, she was thrilled!

Olivia - Blue Ribbon on Quilt
Olivia with the quilt she made
that won her a blue ribbon!

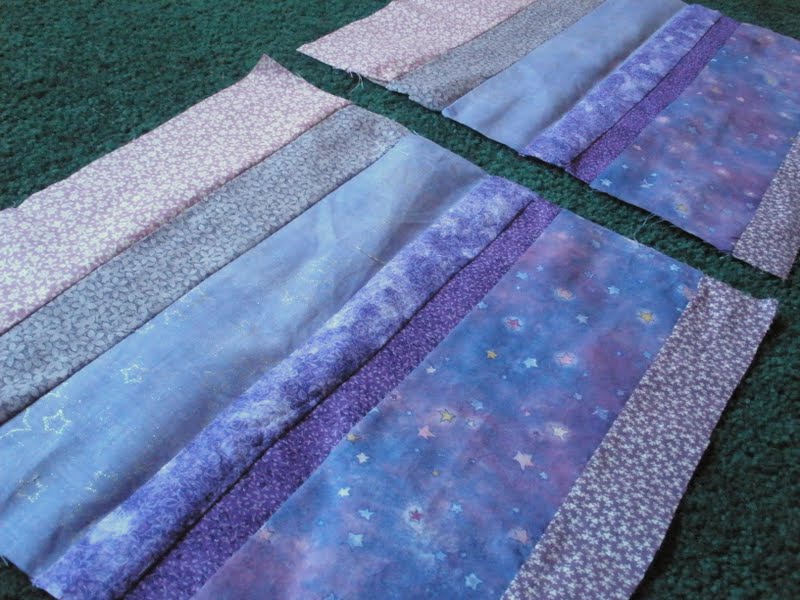
For 2010, at 7 years old, she wanted to challenge herself to do something different. She looked with me at pictures of quilts on Flickr and saw one that she liked. It was a circular quilt made from a variety of fabrics.

The quilt she saw was done in rainbow colors with a white center. Olivia wanted to do hers in all blue fabrics with a white center. Since there was no pattern, we had to create a pattern for the blue pieces and center white piece.

Olivia chose a variety of textures also for the blue pieces which posed a bit of a challenge since each had a different “pull” to it. She had to try sewing different types of fabric together which was a good skill to learn.

Another skill she learned was doing free-style quilting. On the white fabric, she moved her presser foot around in a random pattern to secure the top, batting, and backing together.

Olivia Working on Quilt
Olivia working on her blue and white circular quilt.
She’s doing some free-motion quilting to secure the top, batting, and backing together.
Olivia was 7 years old when she did this quilt (2010).

Sophia started making quilts in 2006 (when she was 5 years old) and did a simple doll-size patchwork quilt from a kit she received for Christmas. The nice thing about the kit was that the squares were already cut for her. She simply had to sew them together and then create the quilt.

Once she learned how to do that she wanted to create another quilt using fabric that she picked out from what I had on hand. She used the same method as I used with Olivia (tracing of the shape on the fabric and then cutting it out).

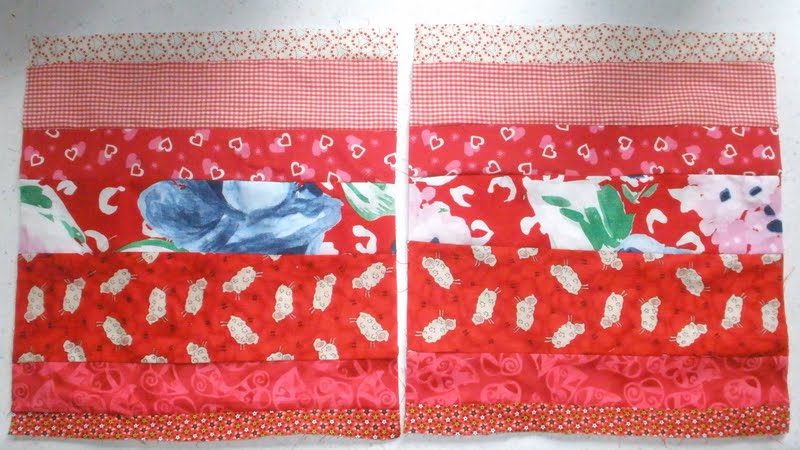
By 2008, she was enjoying quilting so her grandma gave her a quilting kit in her favorite color: pink. The kit came with the fabric and pattern, but Sophia had to cut each piece for the quilt.

The fabric was a variety of textures – cotton, satin, and minky.  It was delightful to feel (from a sensory perspective). In terms of sewing…a bit more challenging, especially for a beginner quilter.

She patiently worked on the quilt and was so pleased with how it turned out. She used the quilt and enjoyed how it felt with the different textures.

Sophia in Bunkbed Camping with Quilt She Made
Sophia in a bunk bed in a camper cabin.
She wanted to bring her quilt on her first camping trip.
Sophia was 7 in this picture (2008).

By the following year, Sophia set a goal of making a quilt for her bed. She wanted a quilt in colors that she liked. We checked out some books from the library and she found a pattern that she liked. After a visit to the fabric store, she was ready to start making her quilt.

Sophia Laying Out Her Quilt
Sophia placed the pieces for her quilt on the floor.
She would pin the pieces she needed to sew as she went along.
Sophia is 8 years old in this picture (2009). 

She was happy with how her quilt turned out; and has used it on her bed since she made it.

Sophia's Finished Quilt
Sophia holding her finished quilt.

She entered the quilt in county fair and received a red ribbon on it (second place). At 8 years old, she was in the category with children up to 16 years old. 

Sophia - Red Ribbon on Her Quilt
Sophia by her quilt at the county fair.
She was 8 years old.

When Sophia was 9 years old, she tried a different form of quilting. Her grandma gave her a pre-printed image on fabric. Sophia quilted around different parts of it to give it texture and definition. She added sequins and beads to embellish it, and then finished off the quilt. 

She entered it into the county fair for one of her 4-H needlework projects. In 4-H, the children talk with a judge who asks them questions about their project and determines how much they understand about their project area. Sophia received a blue ribbon for her project which made her happy.

Sophia Talking About Quilted Wallhanging
Sophia meeting with a 4-H judge to discuss her project.

During the 2010-2011 homeschool year, Sophia took a sewing class at the homeschool co-op. One of the projects she worked on was learning quilting patterns.  During the spring, she learned six new patterns. She chose to sew the squares together to make a little lap or doll quilt.

Sophia with her Quilt
Sophia holding a lap or doll quilt that
shows six new patterns that she learned.
She’s 10 years old (2011).

Quilting has been an important part of homeschooling for the girls. In addition to art/creative expression, quilting helps with math and reading. I’ve also integrated geography and history when doing some of the quilts.

With a back-to-homeschool trip to New England in September to celebrate the start of a multi-year/multi-disciplinary geography study, the girls are excited to visit a quilt shop in New Hampshire that has over 5,000 bolts of fabric.

They each want to pick some fabric so they can make a quilt when they return home. Having a tangible reminder of this special time together is something that I hope they look back on with good memories in years to come.

Peek-a-Boo with the Sewing Machine
Looking back….
Olivia at 4 years old working on her first quilt.

Read Full Post »

For those of you who also have been participating in The Summer of Color and/or who are following along each week, thank you for all the positive comments about what I’ve made each week. Thanks to

During the challenge, I’ve enjoyed creating a variety of window stars and quilt squares in each of the featured colors. The encouraging and uplifting comments have been such day-brighteners for me!  Thank you! 

I’ve been enjoying seeing the creativity and beautiful items that the participants create each week. It’s amazing how diverse all the items are even though we are all using the same color. 

For this week, Kristin assigned the color orange. So, I made two orange window stars that have 16 points each.  Each star is made with a special translucent paper that lets the sun’s light shine through and illuminate the pattern.

Orange Sunburst Star with 16 Points
Orange window star to brighten a room.

This past week I had an interesting thing happen: a hummingbird visited one of the window stars I made that had four colors in it: red, orange, yellow, and pink.

It hovered around the window star for quite a while which was such a treat to see!

Autumn Window Star
I’m wondering if the hummingbird will come back
this week and visit the window stars.

I added a couple more orange stars on August 2nd:

I usually don’t make a lot of orange window stars,
but the summer sun seems to make the patterns more defined.

I finished two more quilt squares so there are now 16 squares ready to be made into a quilt. 

Two quilt squares in orange-patterned fabric.

I’m beginning to think about how to put all the squares together into The Summer of Color Quilt. I’m committed to only using what I have on hand, and it looks like white is the color of fabric that I have the most of – so that will (most likely) be the background of the front of the quilt (in between each of the squares).

The back side of the quilt will be the twin sheet that my daughter no longer uses. It’s a very soft cotton with a high thread count.

It has images of lavender pale lavender violets with a plum- and yellow-color center.  There are 1-2 leaves behind each flower.

With purple and green as my favorite colors, this seemed to be the best piece of fabric for the backing.

Read Full Post »

Here it is Week 7 of The Summer of Color challenge. This week’s color is one of my favorite ones: purple (another favorite color of mine is green). 

When I was growing up, my bedroom was all purple – the walls, the carpet, and even the decorative stenciling at the top of the walls near the ceiling. Anything I made for the room – a quilt, a picture, a pillow – had something purple in it. 

Needless to say, I was excited to work with purple this week, and made some window stars.  Two of the stars are created from patterns that I have used regularly.

The sun was so bright in the afternoon
which revealed the patterns in each of the window stars.

The third pattern (the star on the bottom in the picture above) is one that I designed a couple weeks ago. I’ve been playing around with the pattern in different colors (solo and color combinations).

This is the newest pattern that I created.

A bit about the window stars: the translucent paper is cut into small pieces for each of the points. I hand-fold each of the points multiple times and then glue the points together. Once all of the points are attached, the pattern of the star is revealed.

Some of the stars are easy. For example, the star on the upper right has only five folds per point (with ten points, that’s 50 folds to make the star).

It took 50 folds to make this star.

Other stars are a bit more complicated. The star on the upper left in the picture above has 10 folds per point. It has 8 points, so that’s 80 folds to make the star.

The most complicated star I make has 26 folds per point and 8 points. That’s 208 folds to make one window star. 

The other project I’ve been working on for The Summer of Color challenge is a quilt. As I’ve mentioned before, each week I make two quilt squares that feature the color of the week. Each square has seven strips of fabric of varying widths to represent a 7-day week.

Two quilt squares done in 7 different patterns and shades of purple.
Two of the fabrics have “glittery” and “sparkly” elements –
the bonus challenge of the week.

All the fabric I’m using is from what I have on hand. I am committed to not purchasing any new supplies or materials to make the quilt.  I think of all the quilts that my grandma and mom made using fabric that was available. They made do with what they had rather than always purchasing new supplies.

Thought this would be a good time to challenge myself to make do with what I have rather than acquiring new fabric (however much I would enjoy going to a fabric store and picking beautiful material that is all color- and pattern-coordinated).

14 squares done…2 more to go!
Eenie (the cat) watched me lay out the squares.
I know he wanted to jump on them and mess them up.
He was a good cat…he showed some restraint….at least this time.

Read Full Post »

This month the Unique Women in Business team is doing a Blog Hop focused on Summer Fun.  With temperatures in the 90s (some close to 100 degrees) and dew points in the 70s it feels like it’s quite tropical here in Minnesota.

For me, having fun during the summer means having some flexibility to do things I enjoy doing since the homeschooling schedule is a bit more relaxed compared to the September-May time period. 

During June and July, I’ve been able to make new window star patterns. Here’s a design that I created recently:

Window star in summer colors.
Window stars are available in my shop, Harvest Moon by Hand.

The window star that is pictured above reminds me of sunsets and sunrises in colors I typically see in the summer. There have been some spectacular ones that have colored the entire sky in shades of these colors.  I am always in awe of the incredible natural beauty that surrounds me.

*~*~*~*~*~*~*~*~*~*

Today, I was teaching a friend of my daughters how to sew since she wants to learn how to make her own clothes. The first project I had her do was a little bag with an attached tie.

There were no measurements for this pattern – it was simply an idea presented in a book.  So I showed her how to estimate and create the dimensions for each of the pieces.  By the time she was done sewing her first bag, she had learned some fundamental sewing skills…and felt very happy with what she made.

After seeing the bag (and trying out the pattern I’ve wanted to do for some time now), I made a couple of bags after she left and changed the proportions slightly. 

Two bags that I made.
The bags are a great way to use fabric and ribbon scraps. I’ve made re-usable gift bags using only one color of fabric for birthdays and Christmas.
As I made these bags, I thought they would be good to use for the girls in their backpacks or when traveling. By making the bags in a variety of different sizes and patterns, one’s suitcase, purse, or backpack could be much more organized.
*~*~*~*~*~*~*~*~*~*
Last, having fun during the summer means being able to enjoy nature up close. Today I enjoyed watching a bird take a bath in the birdbath in the backyard. For several minutes, it cleaned its feathers…tossing the water in the air and under its wings.
That, in itself, would have made me happy today. But…I woke up this morning and found that two of the butterflies we’ve been raising since they were caterpillars had emerged from their cocoons.
Around 11:25 a.m., the third butterfly was born and we were able to watch its wings unfold, dry, and be strong enough to fly. What an amazing process!
The girls (and Eenie) watching two of the
newly-born butterflies.

After lunch, we released the butterflies in the backyard. The black tiger swallowtails flew off immediately. One flew right to the purple flowers in the butterfly garden in the backyard where it visited lots of flowers while its wings beat quickly.

The butterfly was flapping its top wings so quickly
(thus, the picture is blurry on the top).
It was such a joy to be able to watch them
change from caterpillars to butterflies during July.

Read Full Post »

Today I made gift and candy pouches from ribbon scraps.  I’ve made gift bags from fabric and fabric scraps that I have had on hand, but never ribbon pouches.

To make a ribbon pouch, you’ll need 2-3 inches wide ribbon scraps. Align ribbons, perhaps pairing sheers with solids so the treats will be visible. Pin the lengthwise edges together.

Two pieces of ribbon pinned together and ready to be sewed.

Trim ends with pinking shears, and stitch together lengthwise. 

Sew the ribbons together along the lengthwise edge.

Cinch one end of the pounch with narrow ribbon or yarn. Slip in mints, gumdrops, or peppermint sticks. Tie the other end.

Completed ribbon pouches.
I’ve been wanting to do this project for a long time now, but it seems like when the holiday season arrives this gets put to the bottom of the priority list. By crafting in July for Christmas, it’s a way to enjoy the process of creating…without the pressure of the holidays.

Photobucket

Read Full Post »

For the first day of White Christmas in July, I made an embroidered dove garland.  The doves’ bodies are cut from a felted wool blanket.

Part of the hand-embroidered, felted garland I made.
The doves are made from a felted wool blanket.

Each dove is embroidered with a simple Scandinavian design. I had hoped to trace the designs onto the bodies with a disappearing ink pen. No such luck. The felted wool sweater is so thick that even with the pattern on top of a light board, the image was impossible to see.

A few more designs on the doves.

All of the embroidered designs are free-handed. I looked at the designs and tried to replicate them as I went along.

The last four hand-embroidered doves.

To make the garland, the doves are evenly spead along a piece of ribbon.  Although I would have preferred to use another type of ribbon, I’ve been committed to using what I have on hand rather than purchasing new supplies. So I ended up cutting a narrow strip from a 2″ wide piece of a soft-textured, almost velvet-type ribbon. 

The garland by the woodstove.

Each dove is hand-sewn in place so it doesn’t shift when the garland is hung.

I’m happy to have the garland done and ready to be used in December when it will be time to decorate for Christmas. 

Photobucket

Read Full Post »

I can’t believe this is already Week 6 of The Summer of Color challenge. This week’s color is red; and I did a couple of things with this color.

First, I made two red window stars. They are made from translucent paper that lets the light shine through so the pattern of the star is revealed. 

Two red origami window stars.

The 8-pointed star with the sharp points is folded 9 times per point. With eight points, it is folded 72 times before it is glued together.

The other star I made is folded 19 times per point. With 8 points, it is folded 152 times before being glued together.

*~*~*~*~*~*~*~*~*~*~*~*

I also made two quilt squares this week. There are twelve squares now…the quilt is coming along.

Two red quilt squares. Seven different fabrics are used for each square
to represent seven days in the week.

As I mentioned last week, I’m using only fabric that I have on hand for the quilt. I’m not purchasing anything new. It’s definitely one of the most resouceful, “make do” quilts I’ve made. Only four more weeks left – or eight quilt squares – before I’m able to start arranging them and laying out the quilt top. 

*~*~*~*~*~*~*~*~*~*~*~*

Although the red isn’t as vivid on this little bird as it is on adult robins, it fits the challenge of incorporating something winged into your work (in this case, a quick photo).

I was walking to the garden on Friday afternoon, and a ball of feathers moved on the ground.  A baby robin had fallen from its nest.

Baby robin on the ground.

It was quiet for a while, but very curious and eager to be fed.

When I moved the camera a bit closer,
it opened its mouth slowly to be fed.
After a call to the wildlife rehabilitation center, they said that it would be fine to pick up the bird and put it back in the nest if it had not already flown back up to the nest. Birds have a very weak sense of smell, so there’s not a problem with the mother rejecting the baby.
By the time I went back outside, the baby bird had flown back into the nest. I felt so lucky to have been able to see the young bird at this stage of its life. Normally, the robin nests are so high and well-protected that the young ones are not visible until they are fully-grown.

Read Full Post »

I’ve been enjoying the past four weeks of The Summer of Color challenge. Week 5 is no different.  This week’s color is brown, and I made three origami window stars as well as completed two more squares for my Summer of Color quilt.

Window stars that I made with brown translucent paper.
Each of the star points is folded multiple times and glued. Then, the points are attached to one another to reveal the window star’s pattern.
I’ve made this pattern before, but never in brown.
It’s interesting how different color paper
can completely change the look and feel of the window stars.

The sun was particularly bright on Sunday afternoon. With a 68% humidity level and temperature in the upper 80s, it felt quite tropical outside. And, to think, about two months ago there was snow on the ground. With the sun so bright, it almost makes the window star points glow.

This would be a good window star to
put up around autumn or Thanksgiving.
The quilt is coming along. I have ten 12-inch squares done which is good.
Ten quilt squares are done.
My goal is to use only fabric that I have on hand rather than buying new fabric.
For each of the quilt squares, there are seven different fabrics used.
Seven represents the number of days in the week.
I’d like to use the fabric that I’ve had for some time now and put it to good use.
This is not the order the squares will be in for the quilt.
I’m going to have a plain-colored piece of fabric in between each
row and column to break up the squares.
(Yes, that’s a dog nose in the upper right hand corner of the picture.
Montague is resting near the quilt squares.)

Read Full Post »

Summer is a time of flowers and this month, the Unique Women in Business team is hosting a Flower Garden theme blog hop.

In June, my daughters, a friend from college visiting from Arizona, and I visited a conservatory that had a beautiful display of summer flowers. The flowers’ fragrance could be smelled even before entering the room where they were located.

One of the flowers at the conservatory.

*~*~*~*~*~*~*~*~*~*
This week I made a new bunting that uses floral prints in every color of the rainbow.

Each flag on the bunting uses floral fabric.

The bunting is 8 1/2 feet long and uses a variety of fabic that I had on hand. Making buntings has been a wonderful way to use fabric and create something useful.

Buntings are available in my shop –

*~*~*~*~*~*~*~*~*~*

I’ve begun planning for the upcoming homeschool year. One of the things I’m going to have Sophia begin this year is a “Book of Mottoes.” This idea came from Simply Charlotte Mason, a great resource for homeschooling following the Charlotte Mason method.

According to the Simply Charlotte Mason website, “Charlotte Mason encouraged that very activity for our children. ‘In the reading of the Bible, of poetry, of the best prose, the culling of mottoes is a delightful and most stimulating occupation, especially if a motto book be kept, perhaps under headings, perhaps not’ (Vol. 3, p. 135).”

Sophia could practice her best handwriting as she carefully copies sayings that are meaningful to her from the books she is reading and from a collection of quotes and poems I’ve found.

One quote I’m adding to the collection comes from Henry Wadsworth Longfellow (a poet she learned about in fourth grade) who mentions flowers in his poem:

Kind hearts are the gardens
Kind thoughts are the roots
Kind words are the flowers
Kind deeds are the fruits
Take care of your garden
And keep out the weeds
Fill it with sunshine
Kind words and kind deeds

*~*~*~*~*~*~*~*~*~*

Also with planning the homeschool year, I’m always looking for recipes that the girls and I can try that tie into something we’re learning. During the summer, we planted nasturiums so they could try edible flowers. The first flower bloomed the other day and more flowers should be following soon.

One of the things we’ll be trying this year is a nasturium salad with lettuce, green onions, and nasturiums from the garden. This is what inspired us to plant nasturiums:

Nasturium Salad

If you have pictures of flowers, art work that you’ve created with a floral theme, or a recipe that uses edible flowers…or any other item you’ve made that includes flowers, please add your link below.

Read Full Post »

Older Posts »